
In this article, we will review how to configure the PPM Express Power BI pack for Executives.
Note, that you need a registered Power BI account in the Power BI service.
Before you proceed to the steps below, make sure you have the following:
- Computer with an Internet connection.
- PPM Express Executive report pack.
Please download it by opening PPM Express => Reporting => Download Executive Report Template. The file contains demo data that you can use to review the report and its functionality if needed.
- Registered Power BI account in the Power BI service.
Please note: Along with the release of PPM Express (23.11.1) and the new version 3.0 of the Executive Pack, we are also making the previous version of the Executive Pack available for download for a limited time (till August 2025). This is to ensure that, if needed, customers who use custom reports connected to the semantic model of the previous version can revert to the earlier pack without disruption. Please note that version 3.0 introduces changes to the semantic model. If your custom reports rely on the old model, they may stop working correctly with the new pack. To ensure full compatibility and take advantage of the latest updates, we recommend updating your custom reports to match the new semantic model used in version 3.0. The previous version of the Executive Pack can be downloaded from this link:
Executive report pack configuration
To configure the PPM Express Executive Report Pack, perform the following:
1. First, publishing or uploading the downloaded report to Power BI Service is required.
The report can be added to Power BI Service either using the Power BI Desktop app or via Power BI Service. Please select the way that works better for you:
- Open the downloaded file in Power BI Desktop and publish it. For instructions on how to publish Power BI reports, please refer to Microsoft documentation.
- Open Power BI Service, navigate to the required workspace, and select Import => Report => From this computer, choose the report file and click Open. .
Note: If you use Power BI Pro, we do not recommend publishing the report to 'My Workspace'. It is recommended to publish the report to a newly created workspace or to any other workspace that you have besides 'My Workspace'. In this way, you can share the report with other team members and navigate to the reports from PPM Express. If you publish the report to 'My Workspace' (in case you are not using Power BI Pro), it won't be possible to share it with other team members, and you will be the only user who can navigate to the report from PPM Express.

2. After publishing/uploading the report, we need to configure its Semantic model (former dataset).
For this purpose, we will open PPM Express => Reporting settings first.

PPM Express has an open protocol that allows querying data - PPM Express OData.
Navigate to the PPM Express Report Settings page. In the Report Settings, you can find the OData feed URL – this is a URL link to PPM Express instance OData that you can use to connect to PPM Express OData.
Copy the URL from the OData feed URL field.

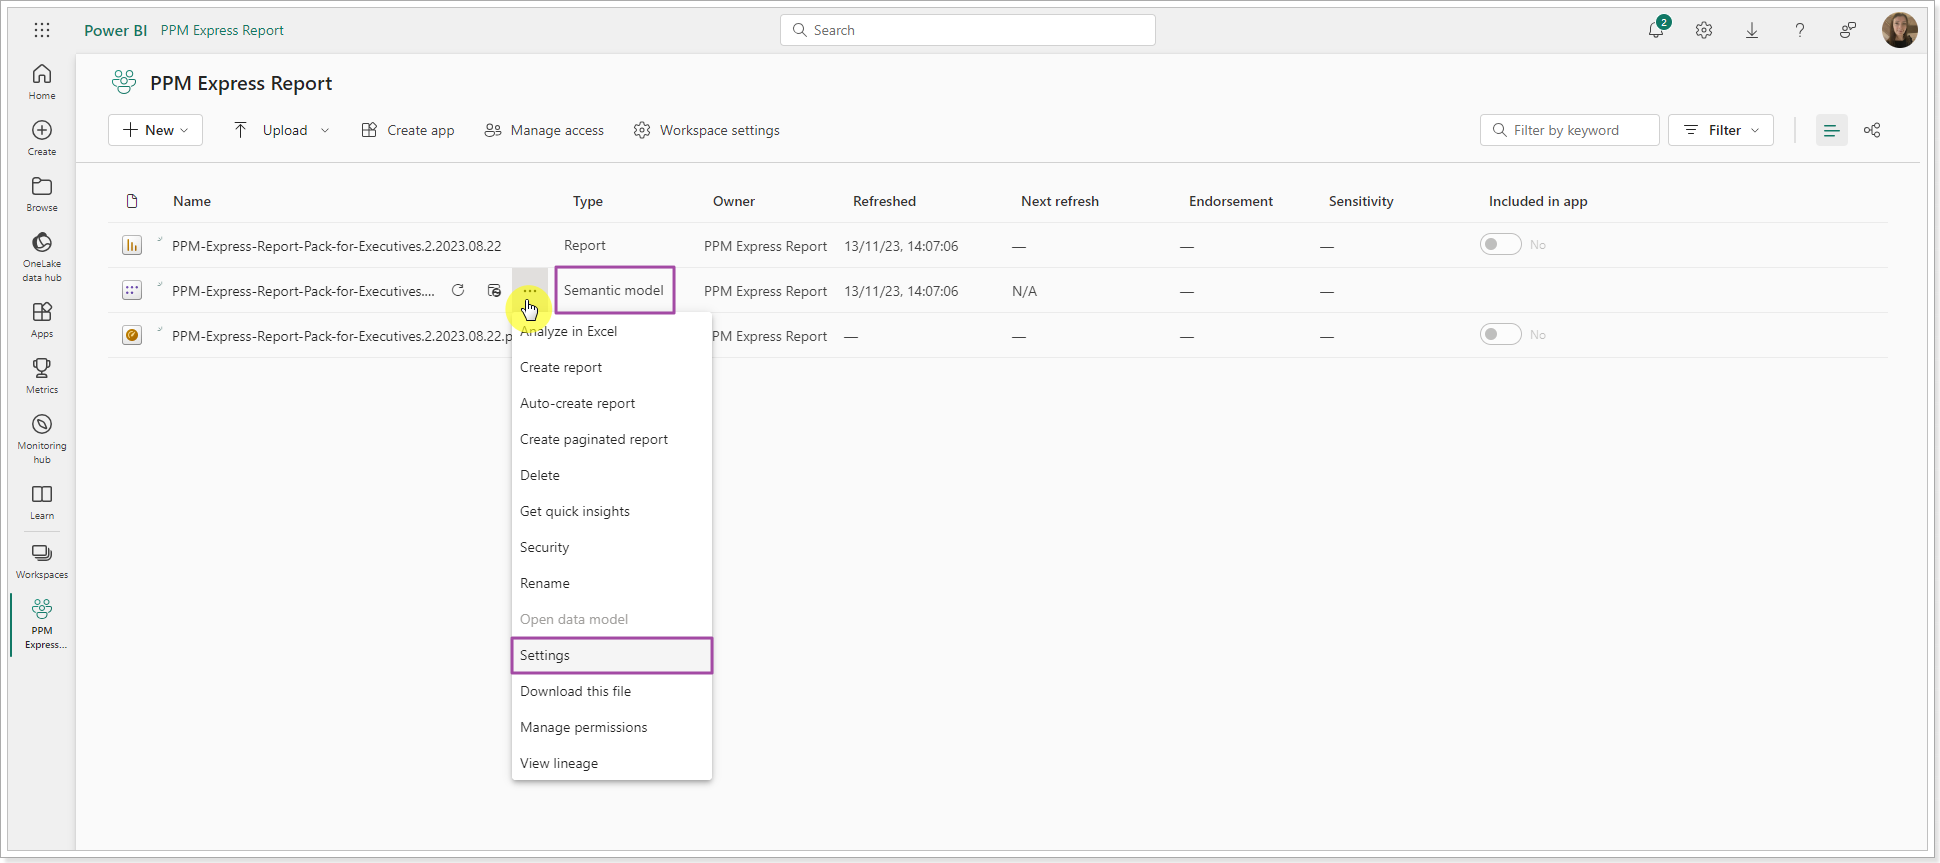
3. Open the Power BI service Workspace where you have published the report. Navigate to the published Semantic model (former dataset), click on the ellipsis button, and choose Settings.
4. On the Settings for the published Semantic model (dataset) page, open the Parameters section and paste the OData URL to the PPMExpressODataUrl (PathToPPMX for older version) parameter.
FeedsWithAllFields (ODataFeedsContainAllFields) parameter is used to include custom fields from PPM Express pages into the semantic model of your report. To include custom fields, you will need to set the parameter in Power BI Desktop and then perform a data refresh there. Changing this parameter in Power BI Service will not affect the semantic model, as the Service can only refresh data; it cannot update the model structure. All future refreshes in Power BI Service will update data only. The structure of the semantic model will remain unchanged unless updated in Power BI Desktop. If you don't need to add custom fields, leave this parameter empty. For detailed instructions, please refer to this article.
FirstDayOfWeek parameter is optional, and the default value is 'Sunday'.
TimelineDateFormat parameter is optional, it is a format string used to define the date label format in the Timeline column of certain visuals. Examples include mm/dd/yyyy, dd/mm/yyyy, and yyyy-mm-dd. The default format is mm/dd/yyyy.

Click Apply.
5. Return to the PM Express Report Settings page.
To be able to create reports, a password is required. In PPM Express, you can create a token that can be used as a password.
To create a token for the report, perform the following actions:
Click Create access token under the OData feed URL.

Click the Generate Token button;
Copy the token.
Make sure you copy the above token now. We don't store it and you will not be able to see it again.

Copy the created token and switch back to Power BI Settings for PPM Express page.
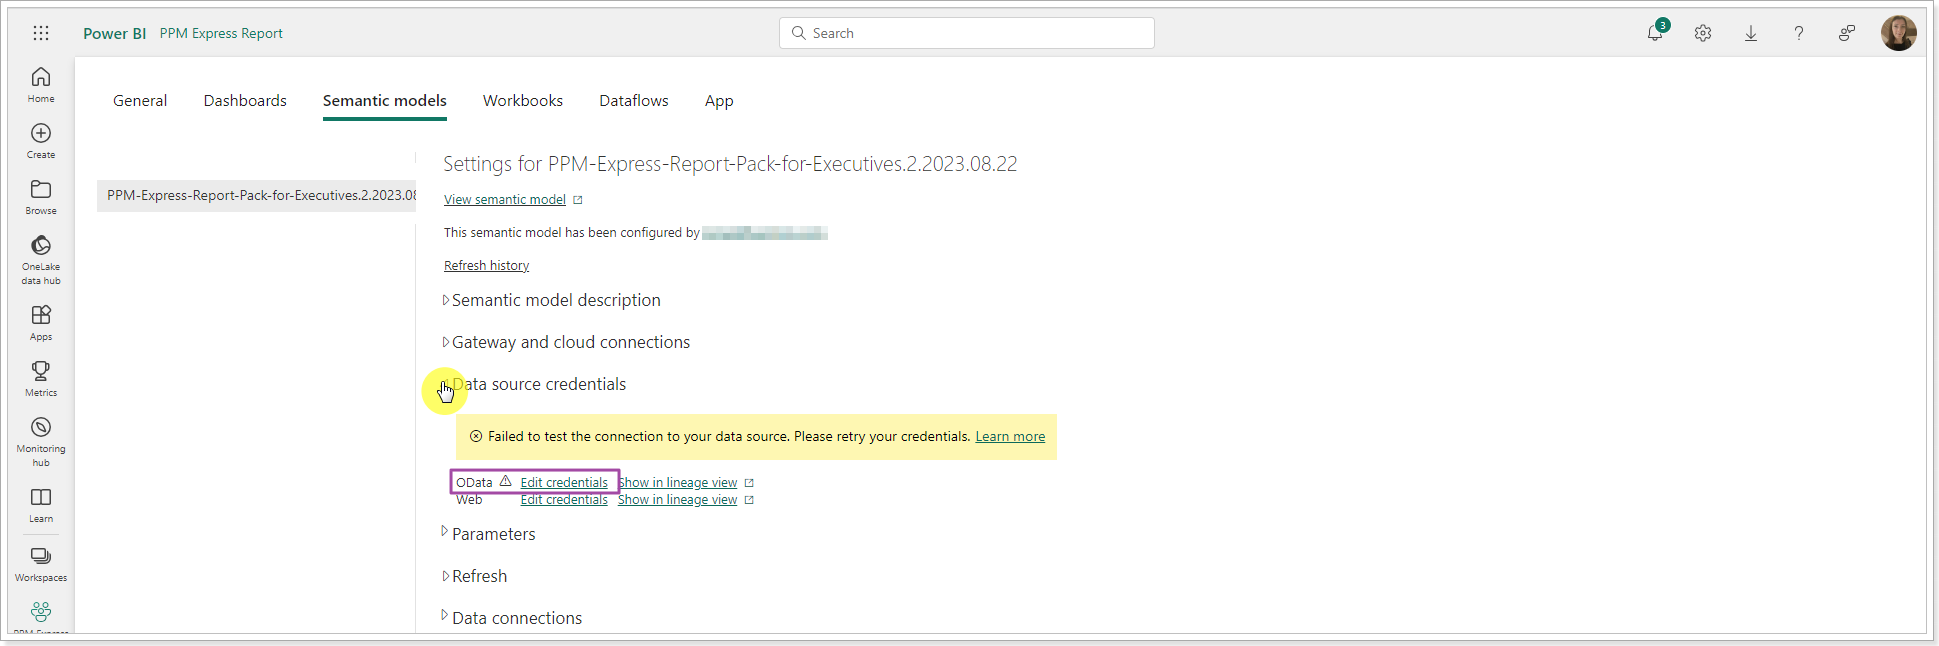
6. Open the Data source credentials section. Click on the OData => Edit credentials link.
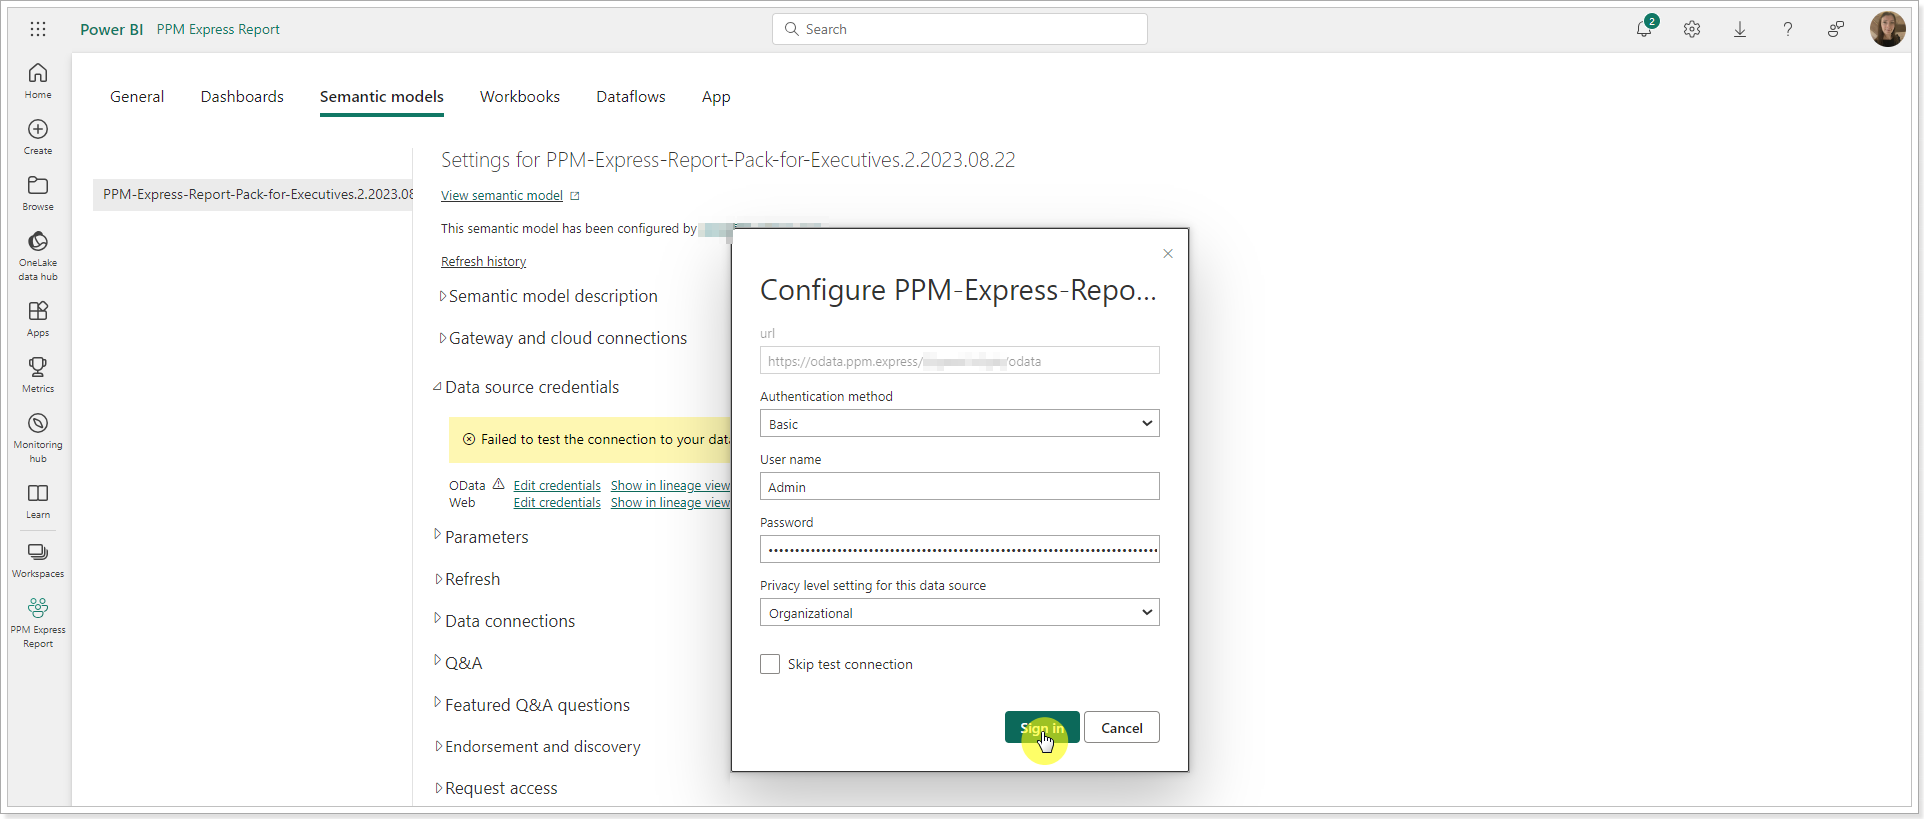
Configure PPM Express Executive Report Pack menu will appear.
Paste the token copied from the PPM Express Report Settings page to the Password field.
Select a Basic authentication method. Fill in the User name field.
Click Sign in.
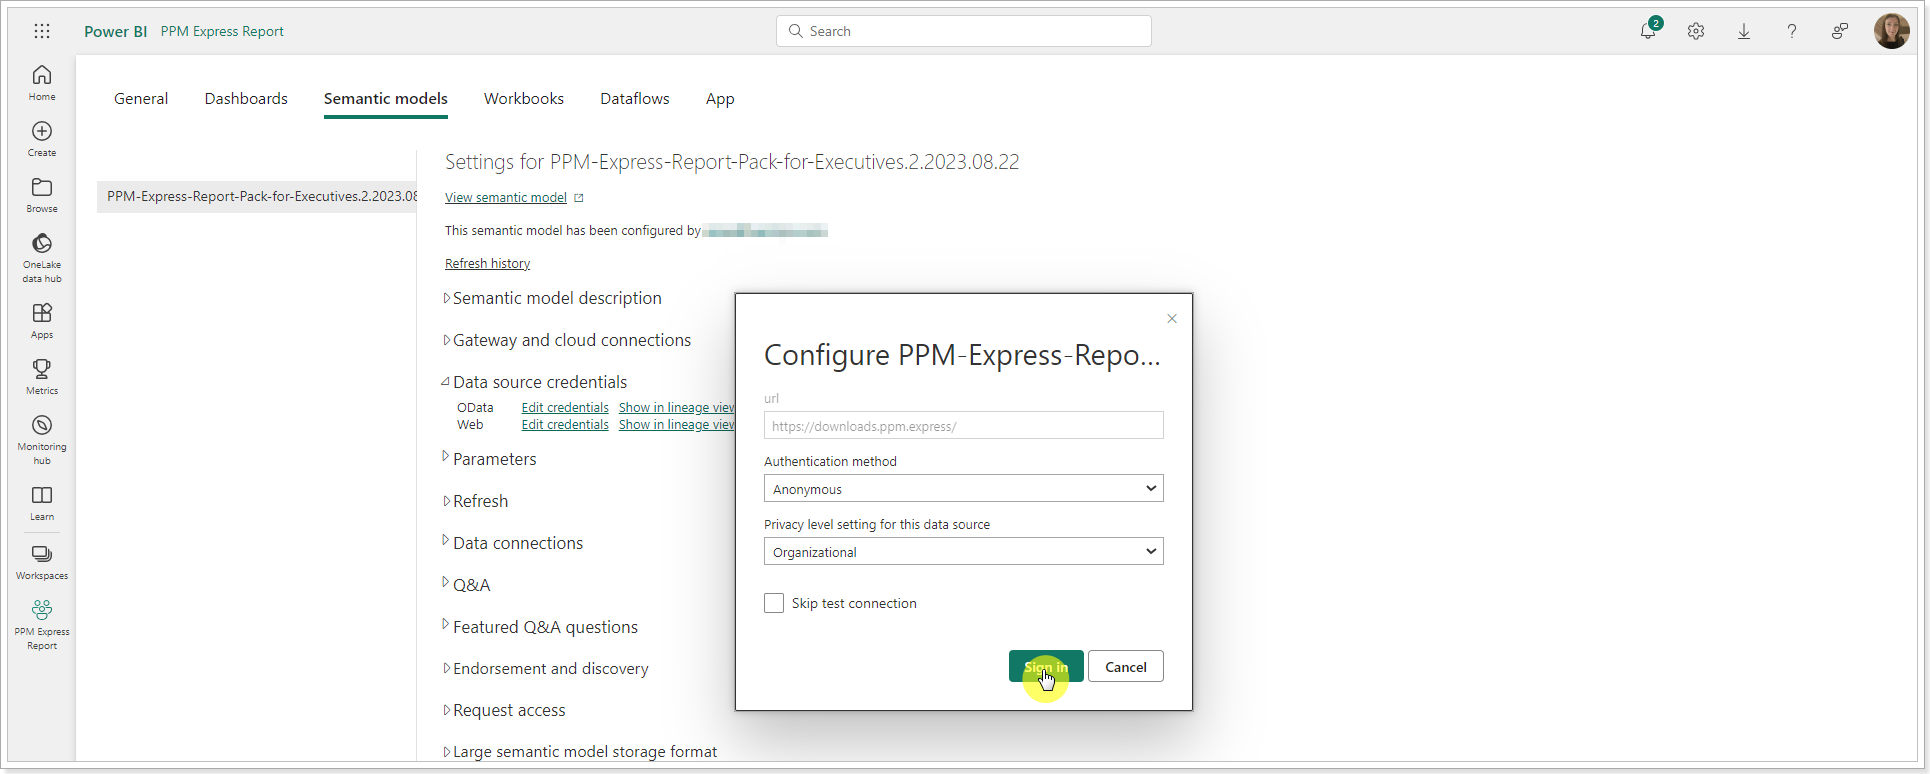
7. Next, we need to establish a connection to the Web. By establishing a connection to the Web, we ensure that the latest version of the report pack will be available for download.
Click on the Web => Edit credentials link.
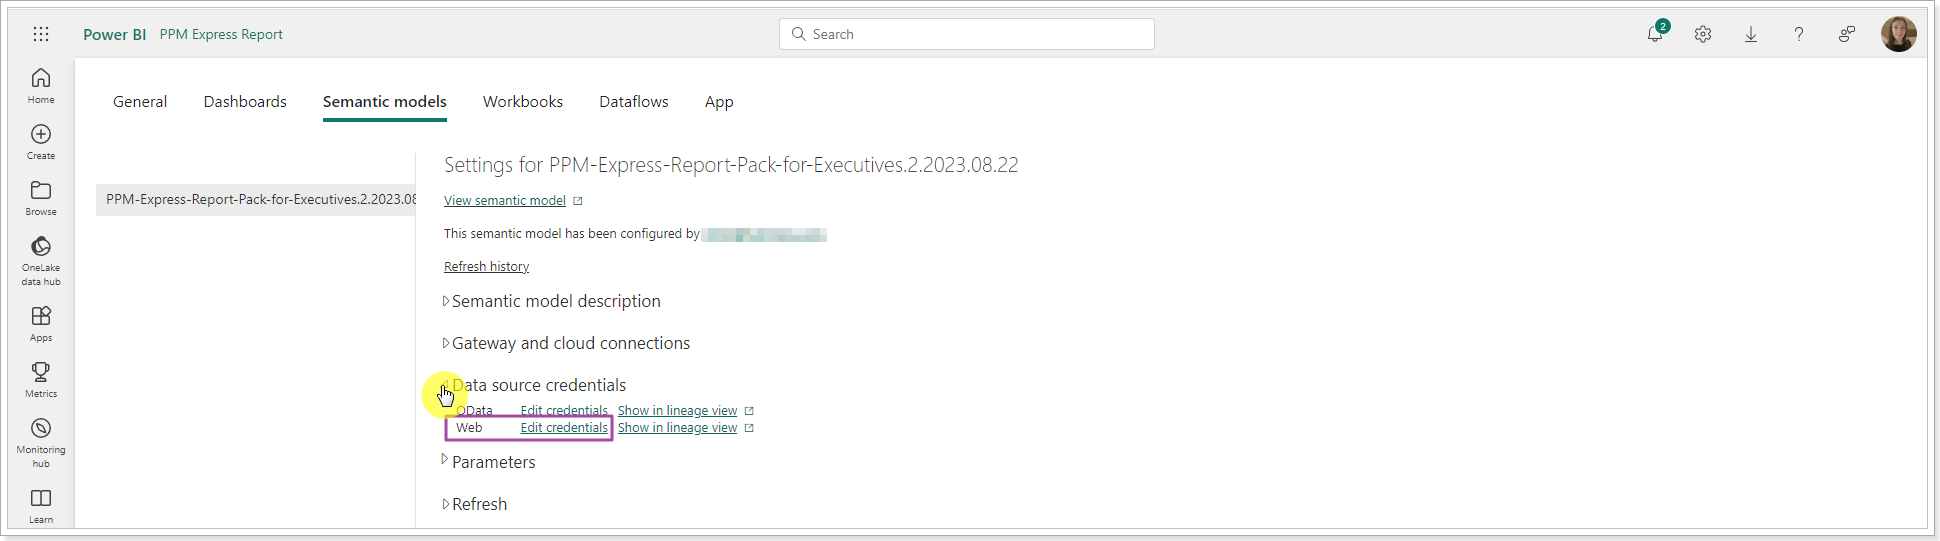
Select an Anonymous authentication method and Organizational privacy level. Click Sign in.
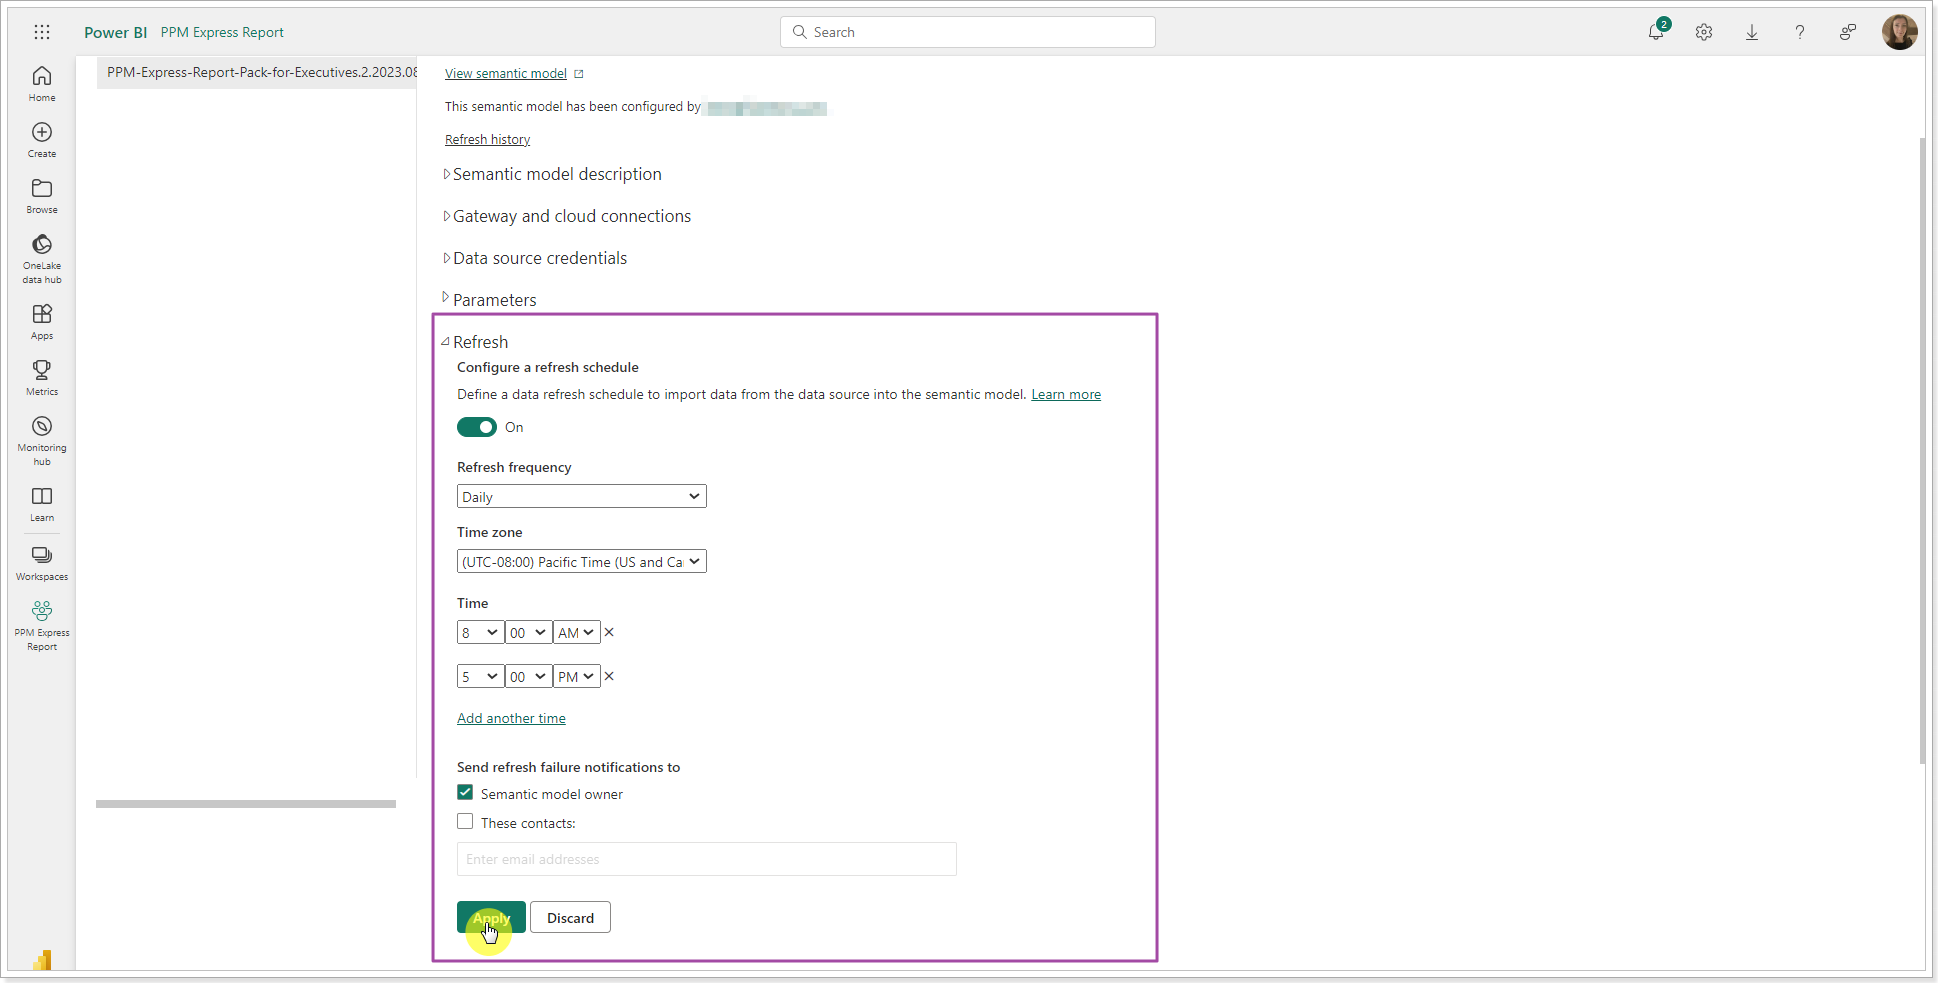
8. It is recommended to set up the Automated Data Refresh at once so that the latest data is displayed for the report. For this, click Scheduled Refresh in the Settings for PPM Express.
In the Keep your data up to date section, toggle the switch to On.
You can also choose the Refresh Frequency, Time Zone, and Time when the refresh will take place.
Click Apply once you are done.
Also, it is required to launch data synchronization for the report at once, so it starts displaying data for the report. For this purpose, open the Workspace where you have published the report, and navigate to the published Semantic model (dataset), and click the Refresh button.

Adding the report to PPM Express pages
PPM Express provides an ability to directly navigate to the reports from different PPM Express pages (Projects, Portfolio, Programs, Resources, Objectives, and Challenges).
To add your report to the required pages in PPM Express, it is required to provide the report home page URL to PPM Express. If you select to open any PPM Express report from these pages, the Power BI service will be opened in a new tab, and information for the selected report will be displayed.
Navigate to the published PPM Express report in Power BI, open its Home page, and copy its URL, including the Report ID (which comes after the 'report' word) and excluding the rest.
It is crucial because you publish a report file using your own Power BI account. The published report resides in the workspace of the account you used. To let the PPM Express App navigate to the published report in the Power BI service, the PPM Express App has to be aware of the report URL address.

Return to the PPM Express Reports Settings page and click on the Executive Pack button.
On the Edit Report page, paste the report URL into the Report URL field.

In the Scope field, select the PPM Express pages where this report will become available.

Click Save Report.
It is crucial to provide a new report URL into the Report URL field and click Save Report after the update of PPM Express Power BI reports.
If you need to export the report, we recommend exporting it to PDF first: Export => PDF.


If you click File => Print this page instead, please enable the 'Background graphics' checkbox in the print preview dialog to get all the boxes to appear and include colors.