Projects can be created by users who have Project manager or Admin permissions.
To create a project:
- Navigate to the Projects tab, which can be accessed by clicking on the Projects icon in the left navigation menu.
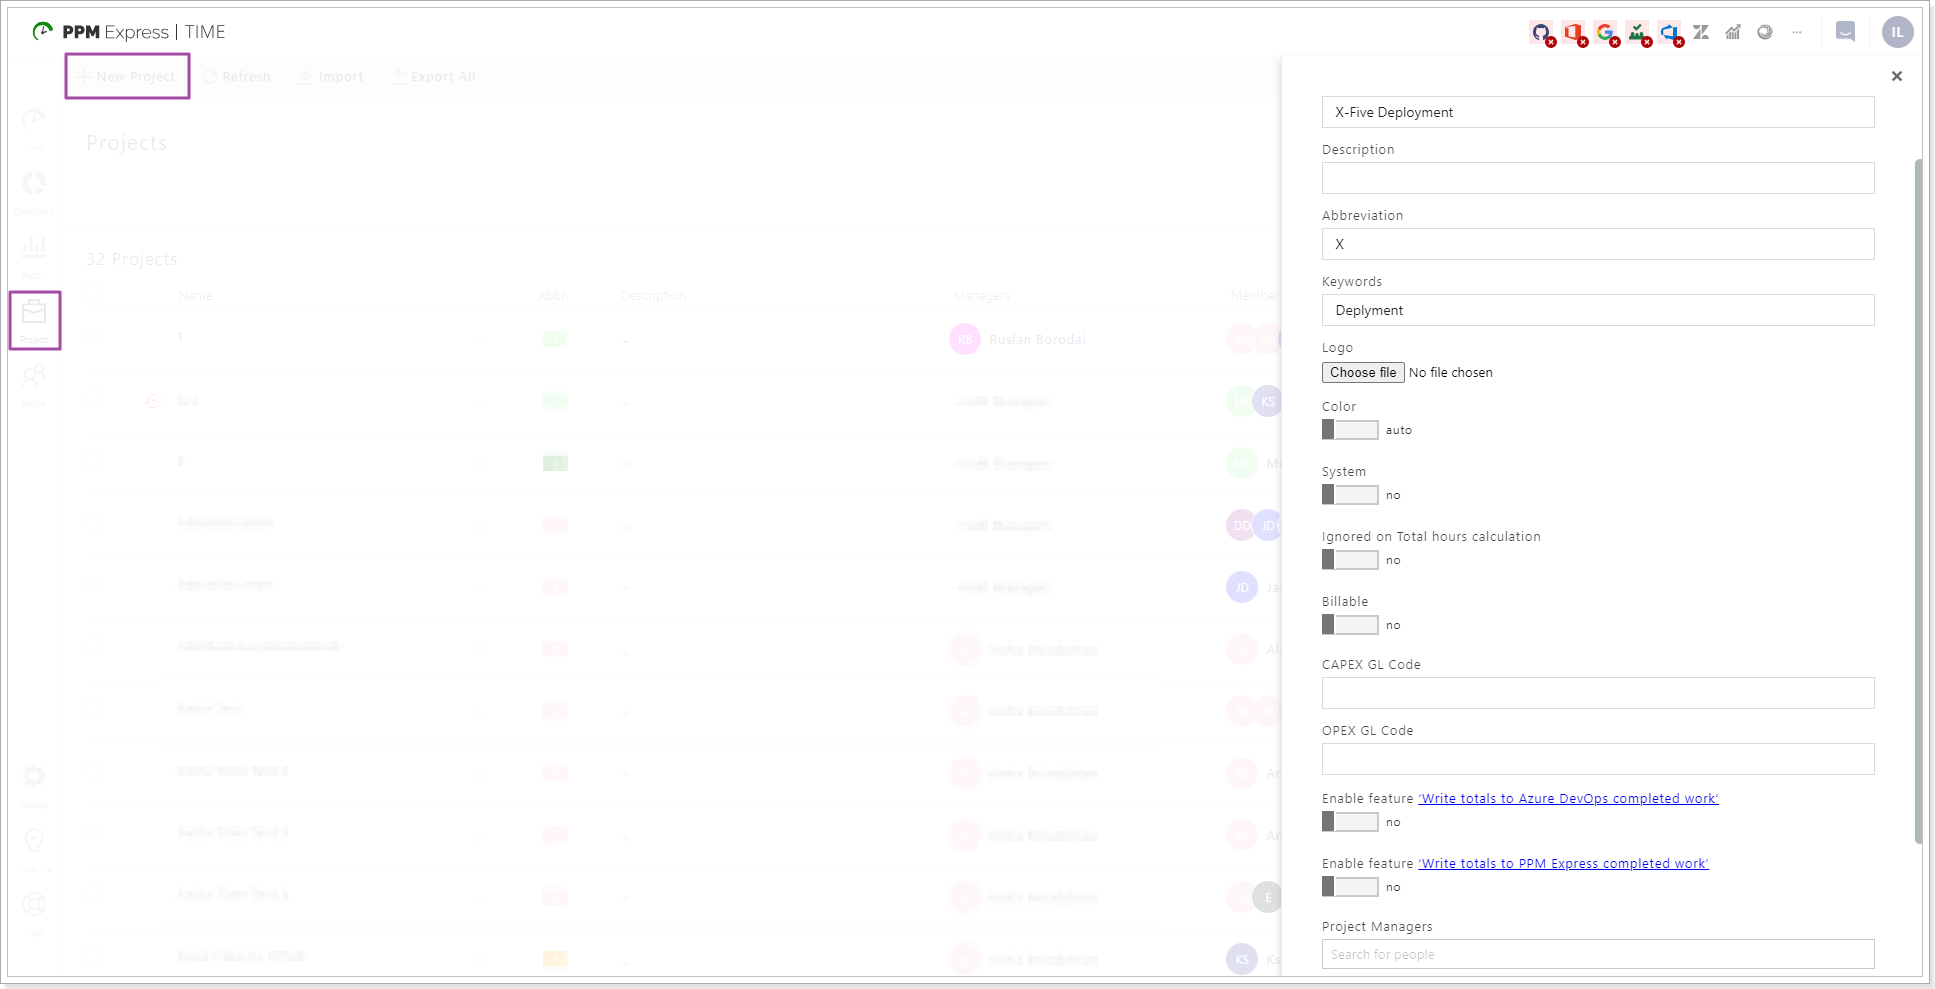
- In the upper left corner of the page, click the New Project button. Create project menu will open.
- Enter the name of your project in the Name field. Optionally, add a description.
- Enter the desired abbreviation to be used for the project icon or choose a logo from a file using the Choose File button.
- The keywords are used for the suggested time entries feature. Please note, that this method is a lot less accurate than project linking and should only be used as an addition. Enter the keywords which may describe the tasks related to your project.
- If desired, choose a logo for your project or set a color for your project icon by switching the Color switcher to Manual and picking a color from the color selector that appears. Alternatively, you can let PPMX Time choose color automatically.
- If you turn the System switcher to yes, anyone using your PPMX Time tenant will be able to add time entries to your project. This feature is mostly used for Out of Office time (Vacation, Sickness etc.).
- The Ignored on Total Hours calculation switcher is also mostly used for out-of-office time and allows excluding the time reported on this project from the work hours reports.
- Billable option allows setting up if the project is billable.
- Capex/Opex GL Codes option provides an ability to set up the GL Codes.
- Enable the feature ‘Write totals to Azure DevOps completed work’, if needed.
- Enable the feature ‘Write totals to PPM Express completed work’, if needed.
- The Managers dropdown allows choosing Project manager accounts that will be allowed to manage this project.
- The Members dropdown allows choosing user accounts which will be allowed to add time entries to this project.
- Click on Create button to save your changes. If this button is grayed out, it means, that you haven't entered some of the essential options.
The newly created project will appear in the project list.
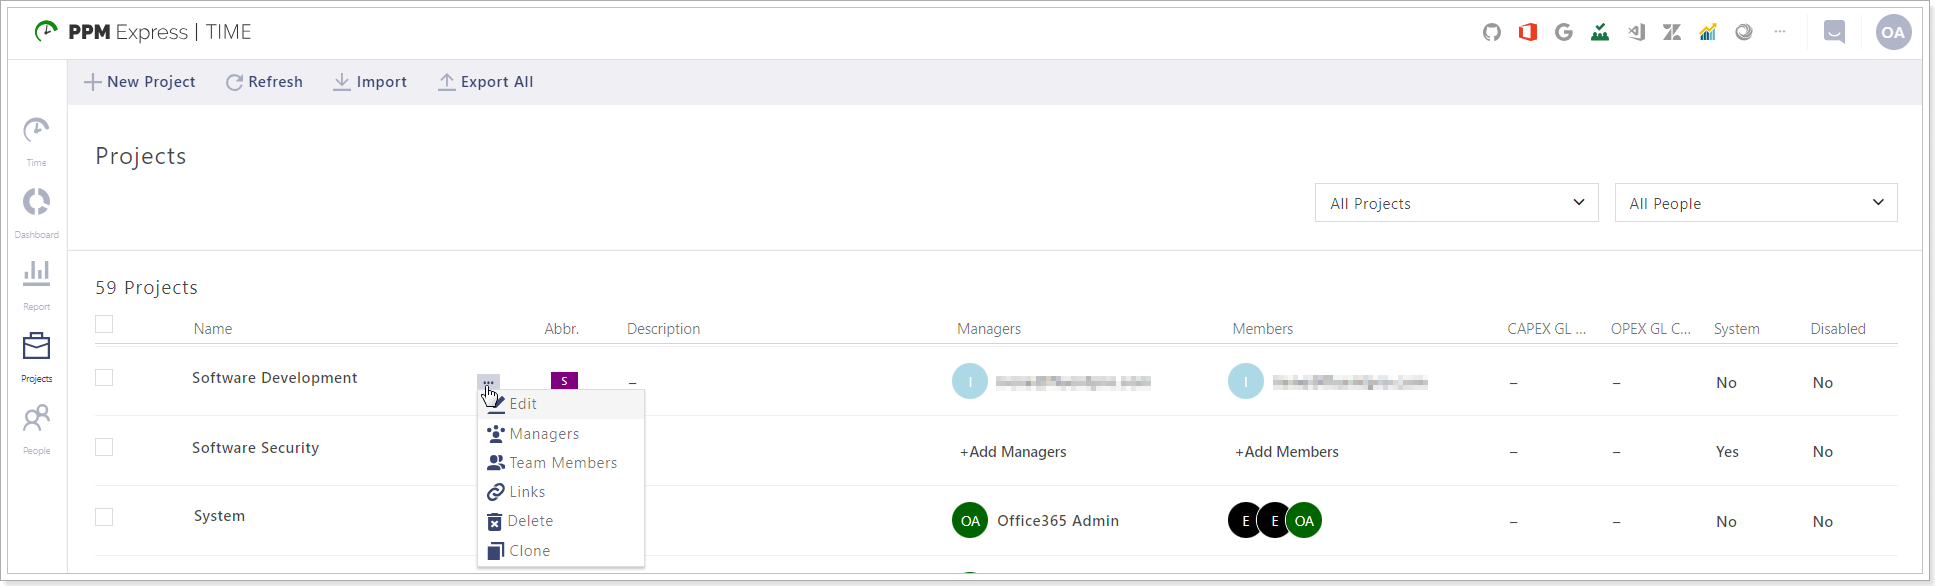
To open the settings for a specific project click on the ellipsis button. The following actions are available:
- Edit
- Managers
- Team Members
- Links
- Delete
- Clone
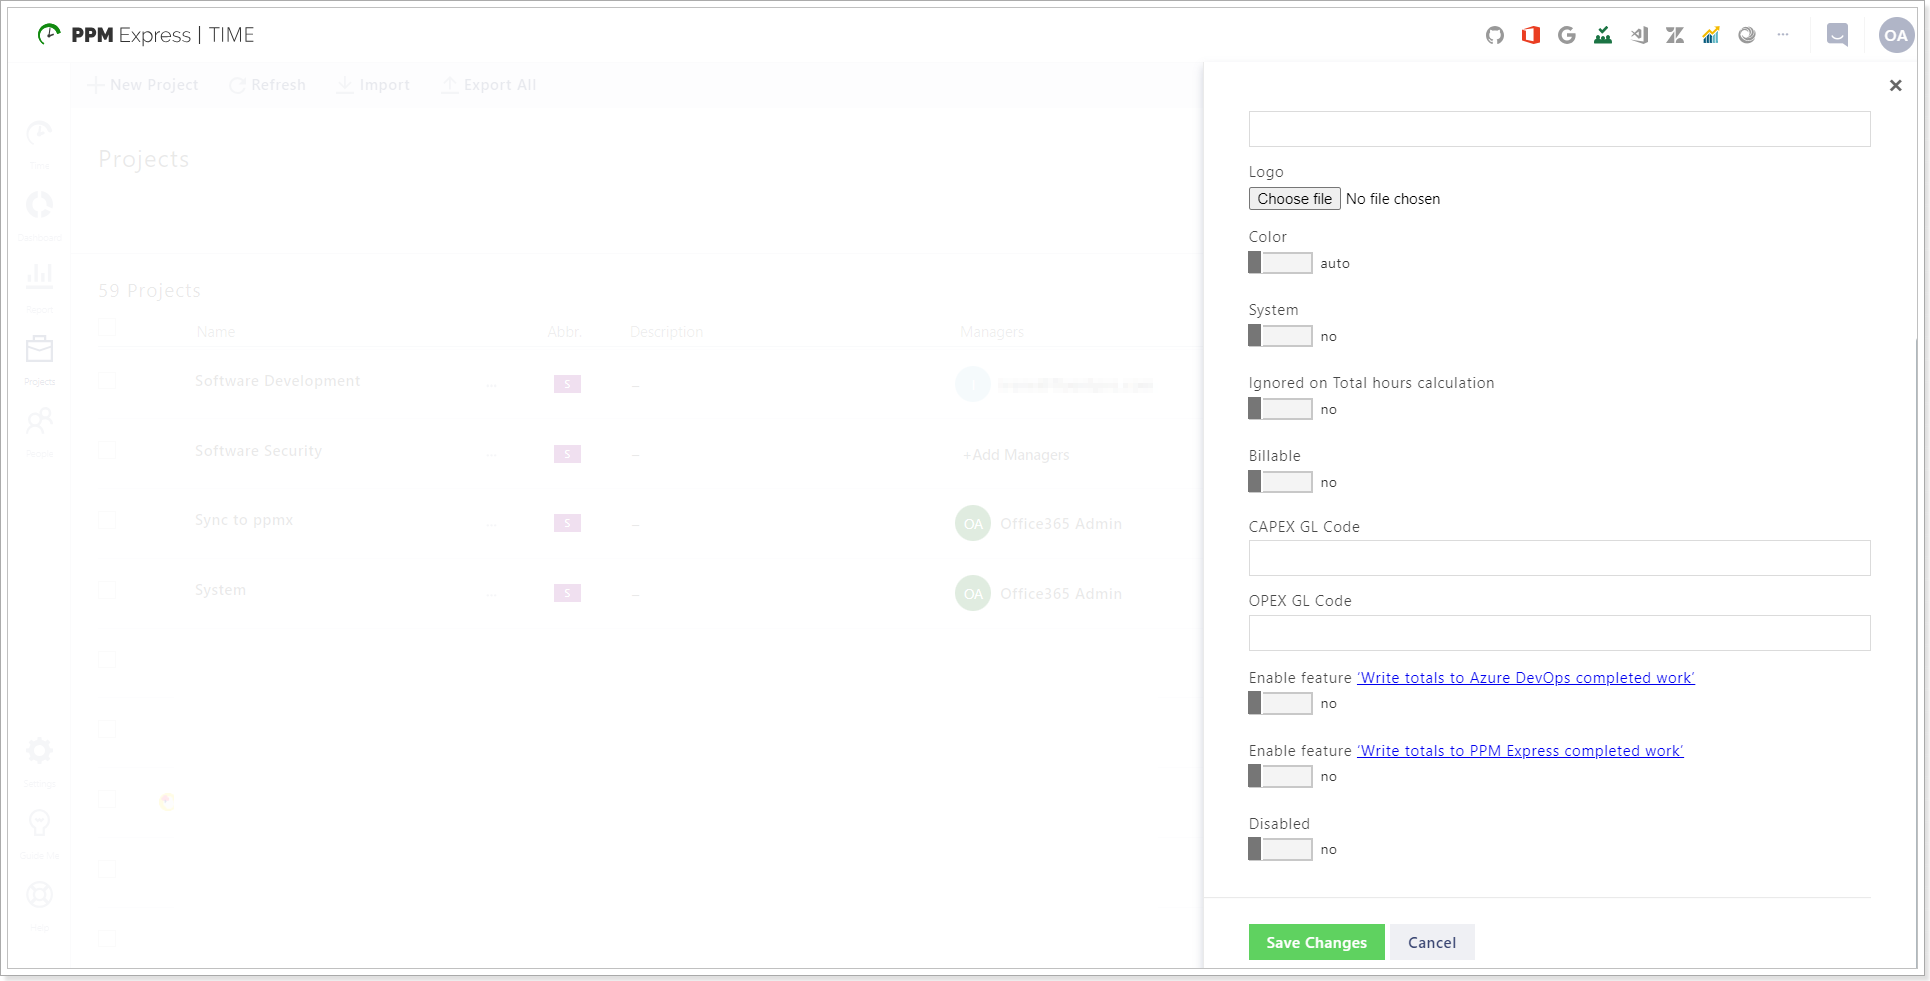
Click on the Edit button to open the project settings menu:
- Logo - allows adding a logo for the project;
- System - allows setting up if the project is system or not;
- Ignored on Total hours calculation - if enabled, the project will be ignored on Total hours calculation;
- Billable - allows setting up if the project is billable;
- Capex/Opex GL Codes - provides an ability to set up the GL Codes;
- Enable feature ‘Write totals to Azure DevOps completed work’;
- Enable feature ‘Write totals to PPM Express completed work’;
- Disabled - allows disabling a project and hiding it from the selection of projects on the time reporting page.