In this article, we will review the My Time page in PPM Express.
The My Time page is where users can report time on the Project tasks they are assigned to, report time on custom tasks, or report time on administrative tasks.
The page consists of two sections: Summary Cards and My Time.
The Summary Cards section represents aggregated reported time for the current calendar week and month correspondingly.
- Expected Time is calculated based on the Resource Calendar and Global Calendar settings.
- Reported Time is the Project Time + Admin Time.
- Project Time is the reported time on the Project level (Project tasks and custom tasks)
- Admin Time is the reported time spent on non-project activities such as vacation, business travel, sick leave, etc.
Clicking on any summary card will filter the My Time section to the current week/month period in case any other timesheet is opened.

The My Time section allows reporting time, importing tasks for reporting, adding administrative time entries, and adding custom time entries.
The Smart Suggestions feature is enabled/disabled by each user on the My Time page. This setting is On by default. However, this setting is available for users only if the Assignment-Based Smart Suggestions or/and Resource Plan Smart Suggestions feature is enabled for the tenant by the Administrator on the Time Tracking Settings page.

If the Assignment-Based Smart Suggestions feature is ON for the tenant, and the Smart Suggestion is enabled by the user on the My Time page, the ‘My Time’ section will be pre-populated with suggested time entries corresponding to the tasks a resource is assigned to in PPM Express Projects and External Projects. Suggested tasks will start, end, or overlap the date range selected.
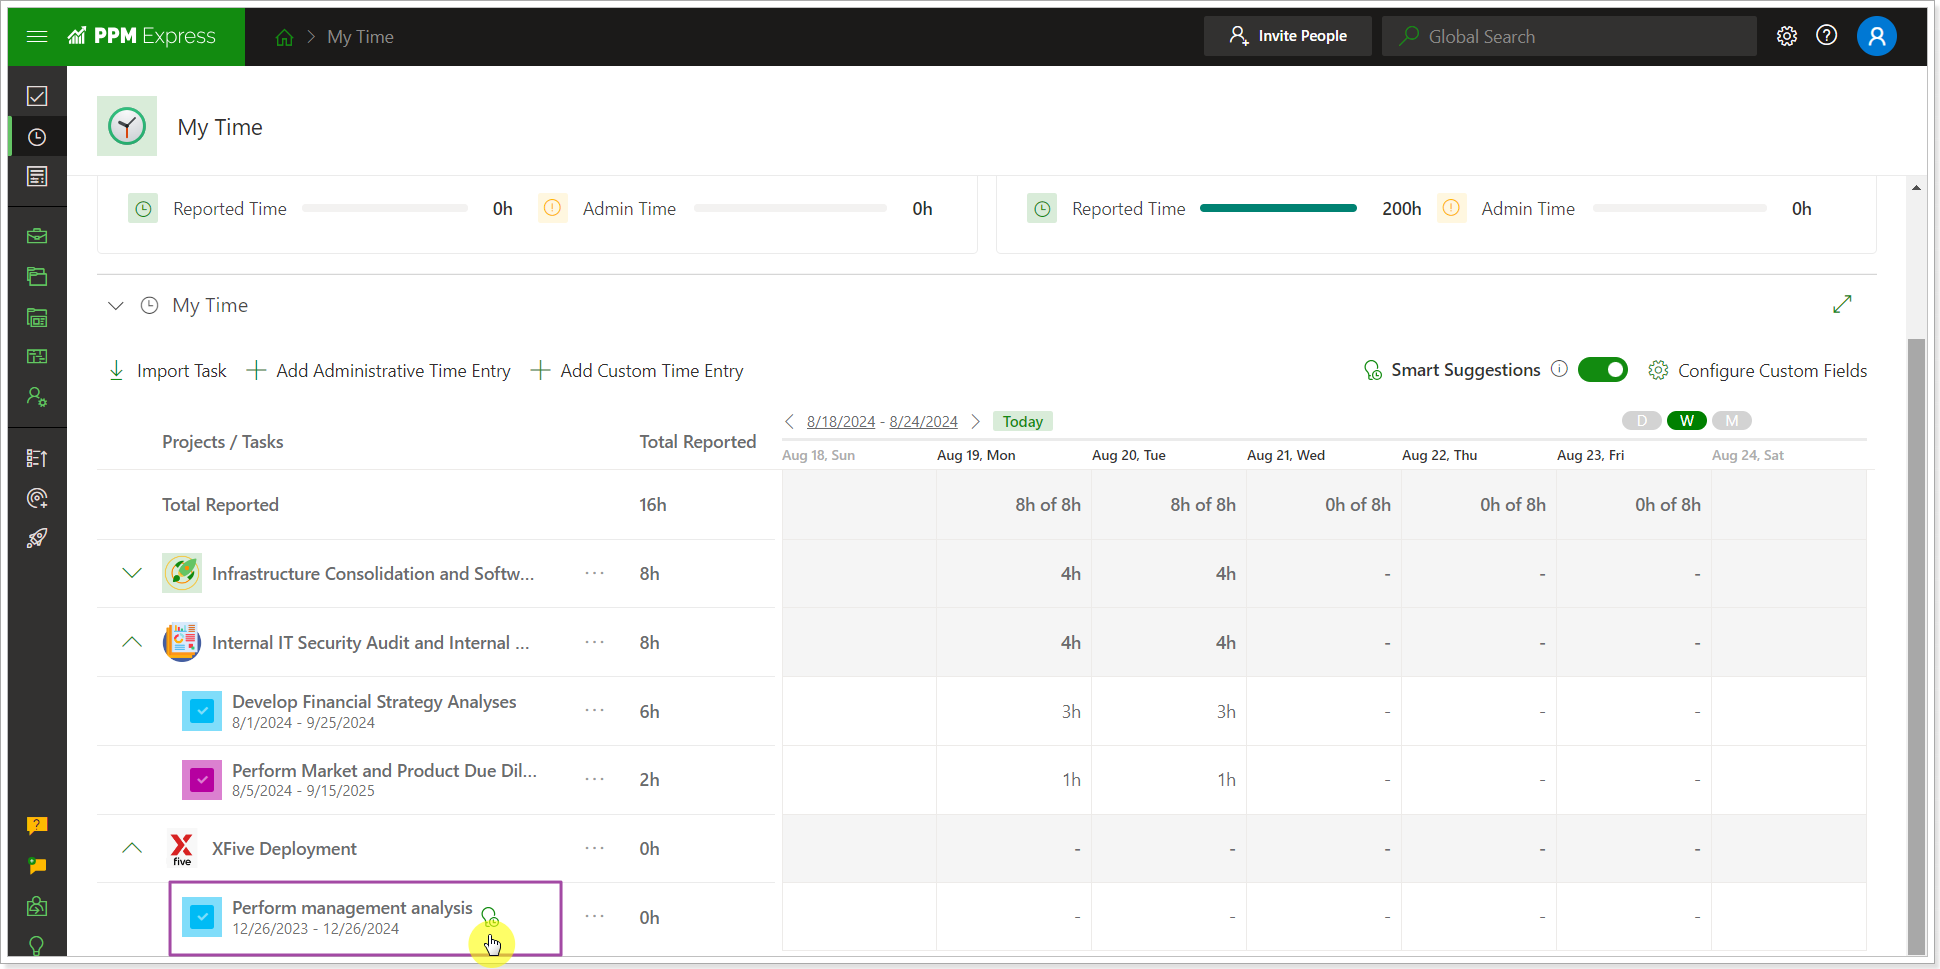
If this option is OFF, the user will have to add all tasks manually using the Import Tasks option in the toolbar.
If the Resource Plan Smart Suggestions feature is enabled for the tenant and the Smart Suggestion is enabled by the user on the My Time page, all Projects where a Resource has Planned hours and where the resource is added to the Resource Plan in the Committed mode will be added to the Timesheet. Also, the selected time period on the Resource Plan should overlap the time reporting period for the smart suggestion to appear on the My Time page.
A timeline entry called 'Project Work' will be created for these Projects on the My Time page, marked with a custom time entry icon.
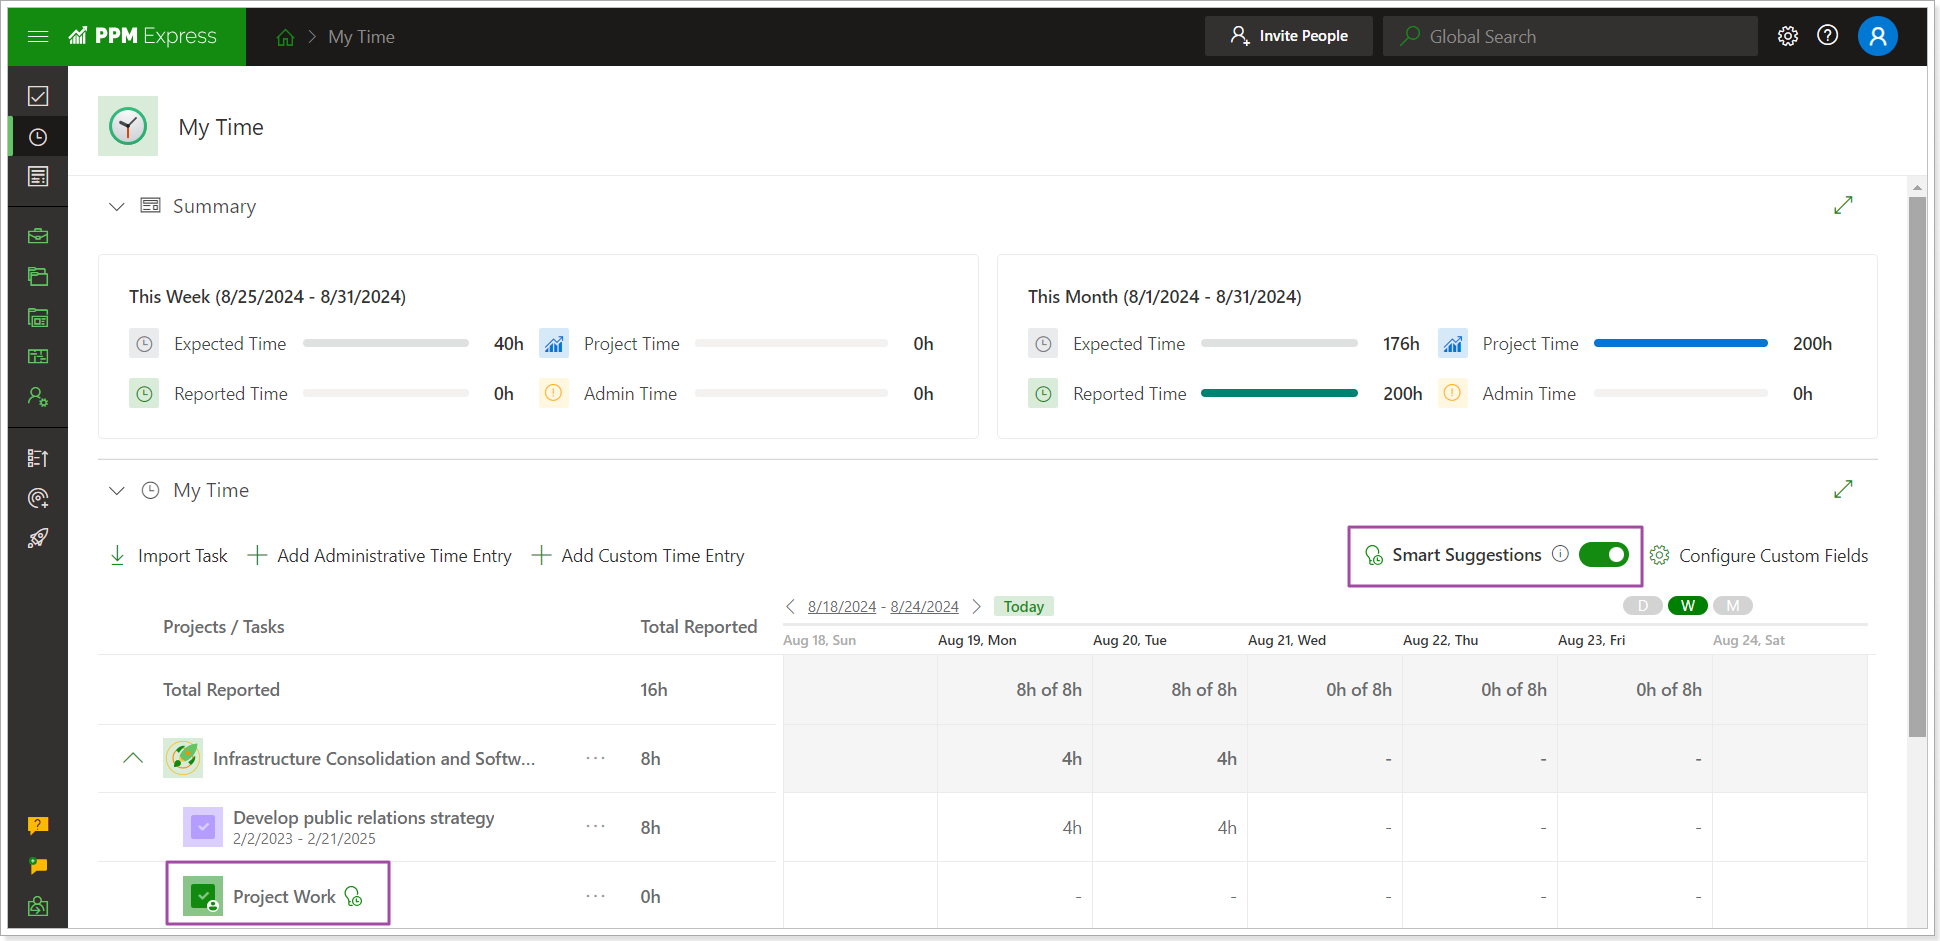
The date range displayed can be changed by clicking on the arrow buttons. You can switch the date range to Today/Pervious-Next Period and navigate to the next/previous period (day, week, or month, depending on what is selected in the Calendar view on the right). Clicking on Today will navigate the user to the period with today's date.
The Calendar view option switches between the Day, Week or Month calendar view in the timesheet.
The Configure Custom Fields setting is available only for Application Administrators or Time Tracking Administrators (together with the Manage configuration permission) and if the ‘Time Tracking Enterprise’ feature is enabled for the subscription plan.
The Configure Custom Fields option allows creating, editing and deleting the Time Entry level Fields.

If the Smart Suggestion is off or no tasks are assigned for the user to start reporting time, it is required to import tasks and add custom or administrative time entries.
The Import Task option allows adding the required tasks to the timesheet and reporting time on these tasks in the related timesheet cells.
If the user has View permission for the Project, any task from the Project can be imported to the My Time page. If the user has no permission to view or edit the Project, but its resource is assigned for tasks within the Project, these tasks are also available for import.
Click the Import Tasks button to add your tasks to the timesheet. By default, the 'Assigned to you' filter shows only the tasks you are assigned to. The ones that are already added to the My Time section are marked as Added. To add a new one, click the Add button next to the required task.
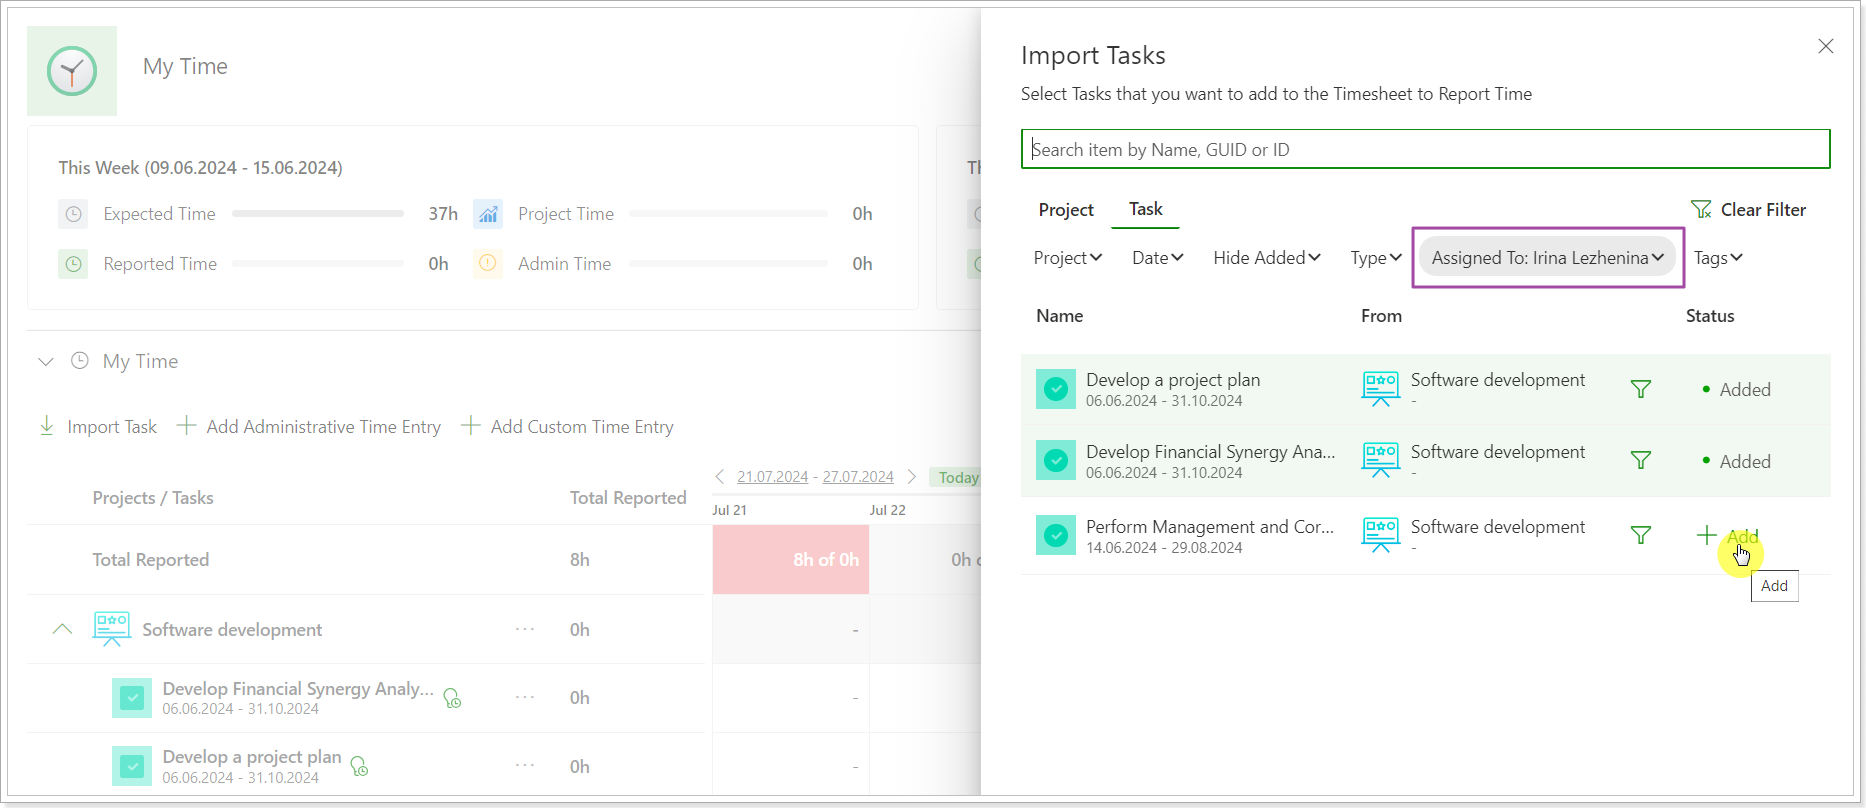
The filter button next to each task filters the list of tasks by Project. You can also clear the filter and search for the required tasks using the search option (by Name, GUID, or ID).
Filters available on the Task tab:
- Project – filters the Tasks out by the Project a user has access to or the ones where a user is assigned for tasks, that start, end or overlap the date range selected in the filter.
- Date – filters tasks by date range, tasks that start, end or overlap the date range selected in the filter will be listed.
- Type – filters tasks by task type (task, story, feature etc.).
- Tags – filters by tags in tasks.
- Hide Added – hides tasks already added to the timesheet.
Filters available on the Project tab:
- Date – filters Projects by date range, Projects that start, end or overlap the date range selected in the filter will be listed.
- Portfolio – filters Projects by Portfolio they are added to, the list in the Filter contains the Portfolios a user has access to.
- Program - filters Projects by Program they are added to, the list in the Filter contains the Programs a user has access to.
- Manager – filters Projects by their Project manager.
- Tags - filters by tags in Projects.
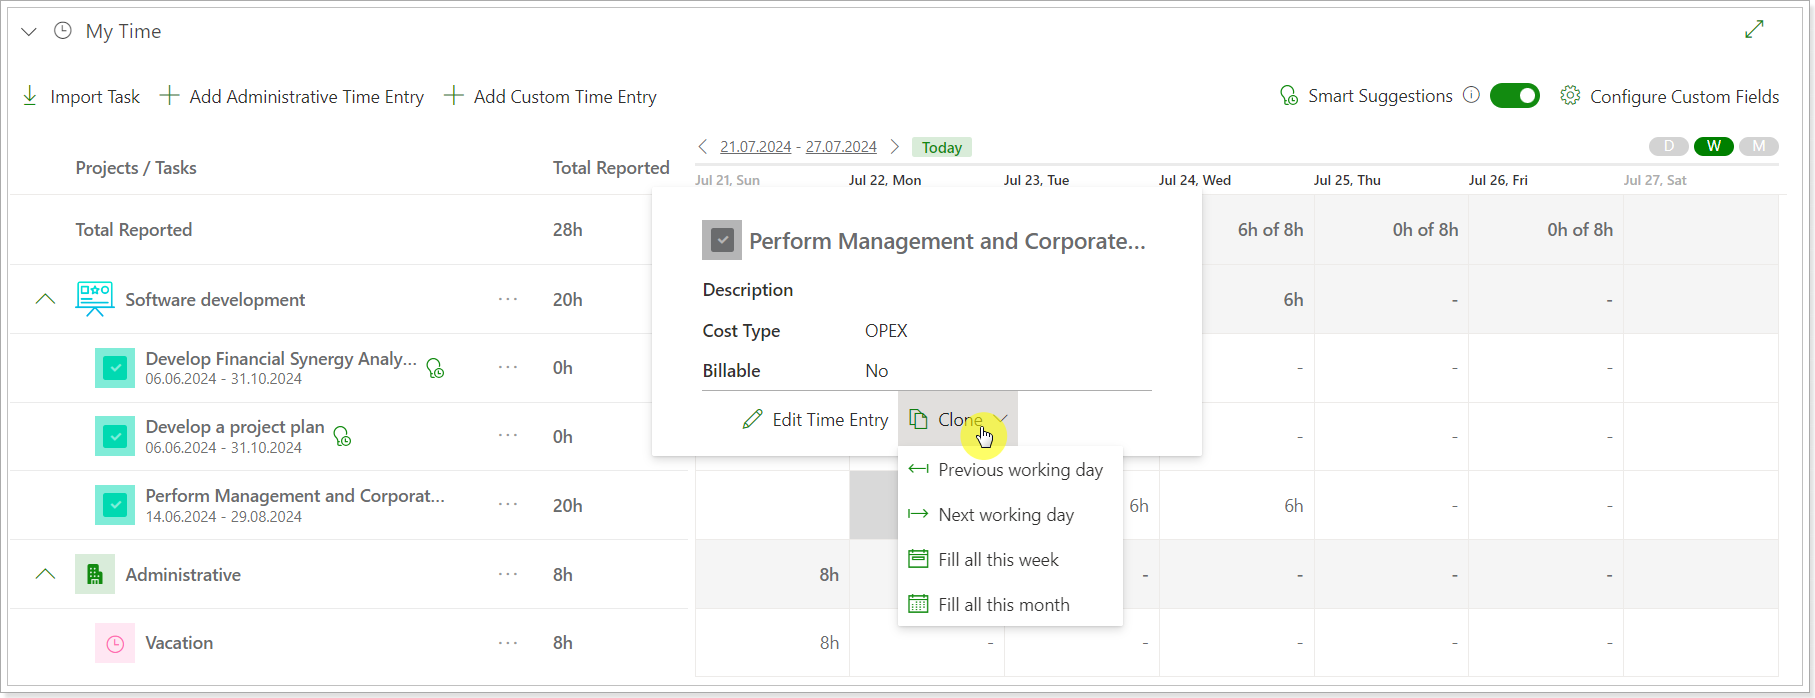
When the tasks are imported, a user can add time to the timesheet cells for each day by clicking on the cell and typing in the value. The reported time can be cloned to the previous working day, the next working day, or filled for all this week/month. To clone the reported time, click on the value in the cell and select the Clone option.
When the reported time is cloned, all field values of the time entry level, including the custom ones, will also be cloned. If the cell where you clone the time has values, the time will be summed up, and the time entry field values will be overwritten.
Also, the task import option is available at the Project level. Click the ellipsis button next to the Project name and select Import Task.

The Add Administrative Time Entry button is used to report time on the non-project and non-working activities. Click the Add Administrative Time Entry button. Select the Date and the Category Name (this field contains the Categories defined on the Time Reporting Settings page), and enter the Time Spent (the predefined value is 8h), type in a description if needed.
Click the Report Time button.
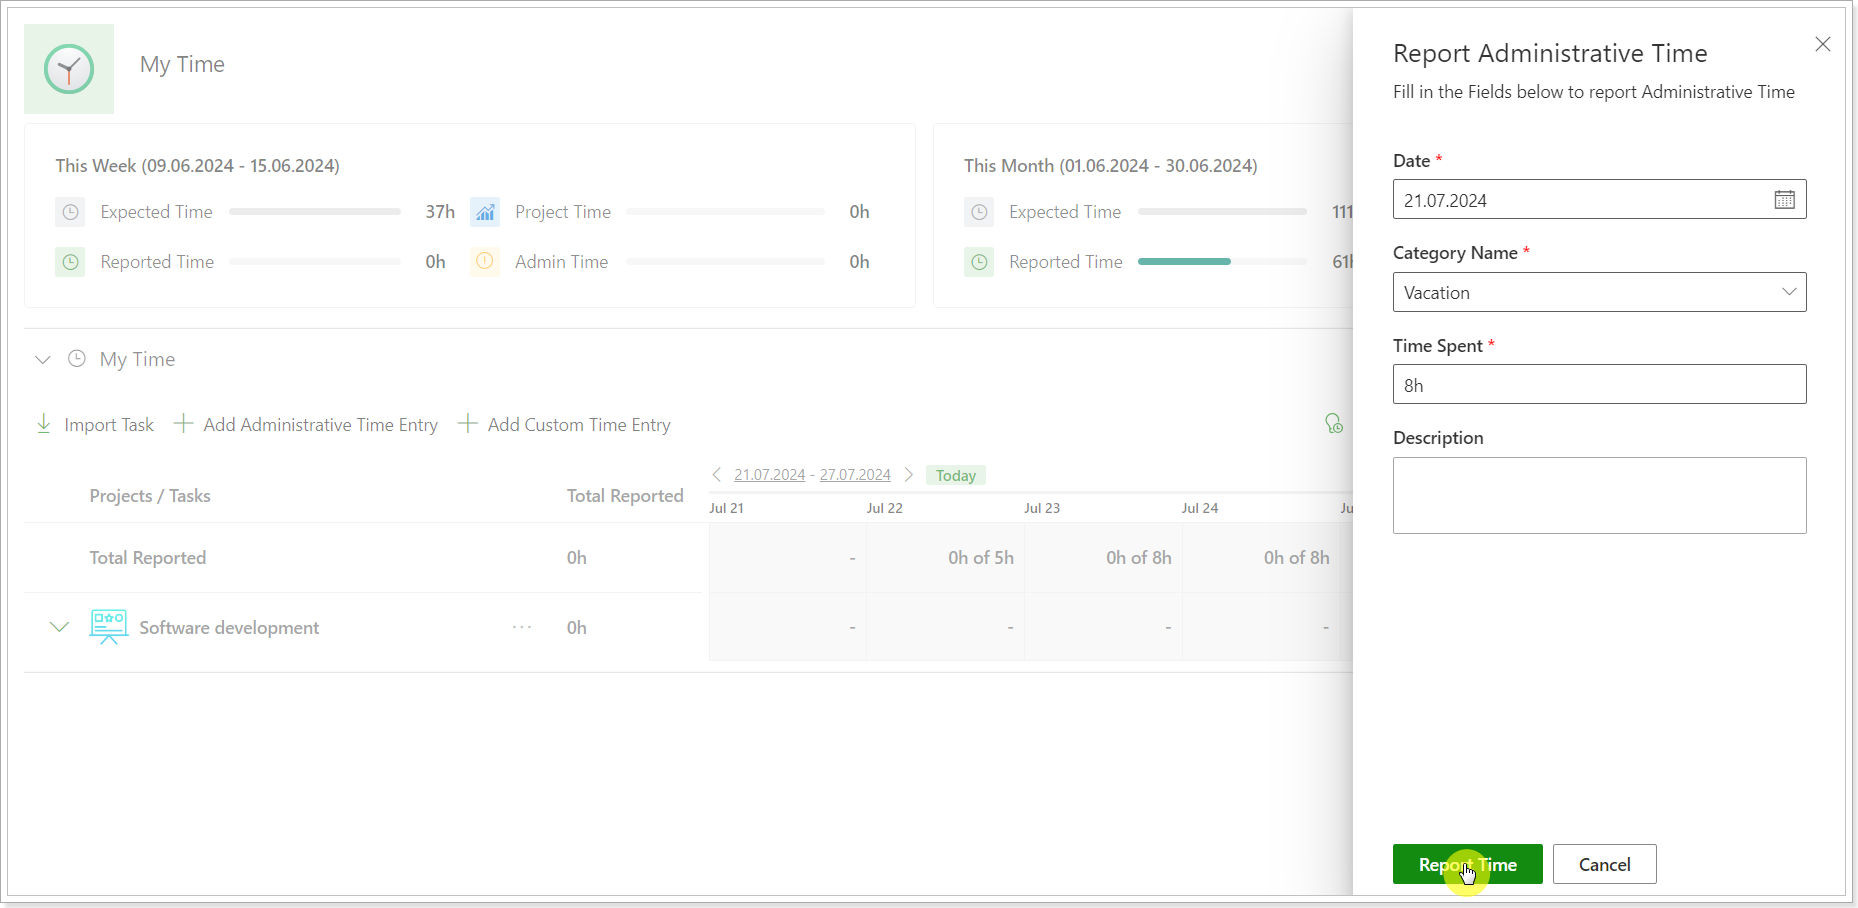 The reported time will appear under the Administrative section on the My Time panel.
 The Add Custom Time Entry button is used to report time on a Custom activity related to PPM Express or External Projects. This activity will be added to the timesheet under the corresponding Project but not to the Project itself.
Click the Add Custom Entry button. You can use the search option and filters to find the Project you need quickly. This page shows only the Projects to which a user has access or tasks assigned. Click the Report Time button.
 Select the date to report time, type in the entry name, the time spent, description, select the cost type and if it is billable. Click the Report Time button.

The ‘Report Time’ button adds the timesheet line with a custom entry under the corresponding Project with the reported time on the selected date.
The arrow-like button next to the Project and Task names redirects users to the corresponding internal or external Project and Task. The Project or Task will be opened in a new tab.

Clicking on the Actions menu, you will find additional options for time reporting:
-
Import from M365: With this functionality, users can seamlessly import their Microsoft 365 activities, such as events, tasks, and other items, directly into PPM Express as time entries, making it easier to track and report time spent across projects.
To start using this feature, you need to add the Microsoft 365 connection from the My Time page using your Microsoft 365 account. For more details, please refer to this article. - Import External Time: This feature allows users to import external time tracking suggestions created via the API into PPM Express as Time Entries. External suggestions, including project tasks, custom tasks, and administrative tasks, provide a streamlined way to integrate time tracking data directly into the platform. For more details, please refer to this article.

