
In this article, we will review how users can report and manage their time spent on tasks, administrative activities, and custom activities.
Time reporting
Users can report their time from several pages in PPM Express:
- My Time page (available from the left navigation panel)
- Project Tasks page
- My Space page
The My Time page is the main page where time is reported and managed. Time reporting on the Project Tasks and My Space pages is available as a quick and easy way of tracking time on the tasks assigned to the user.
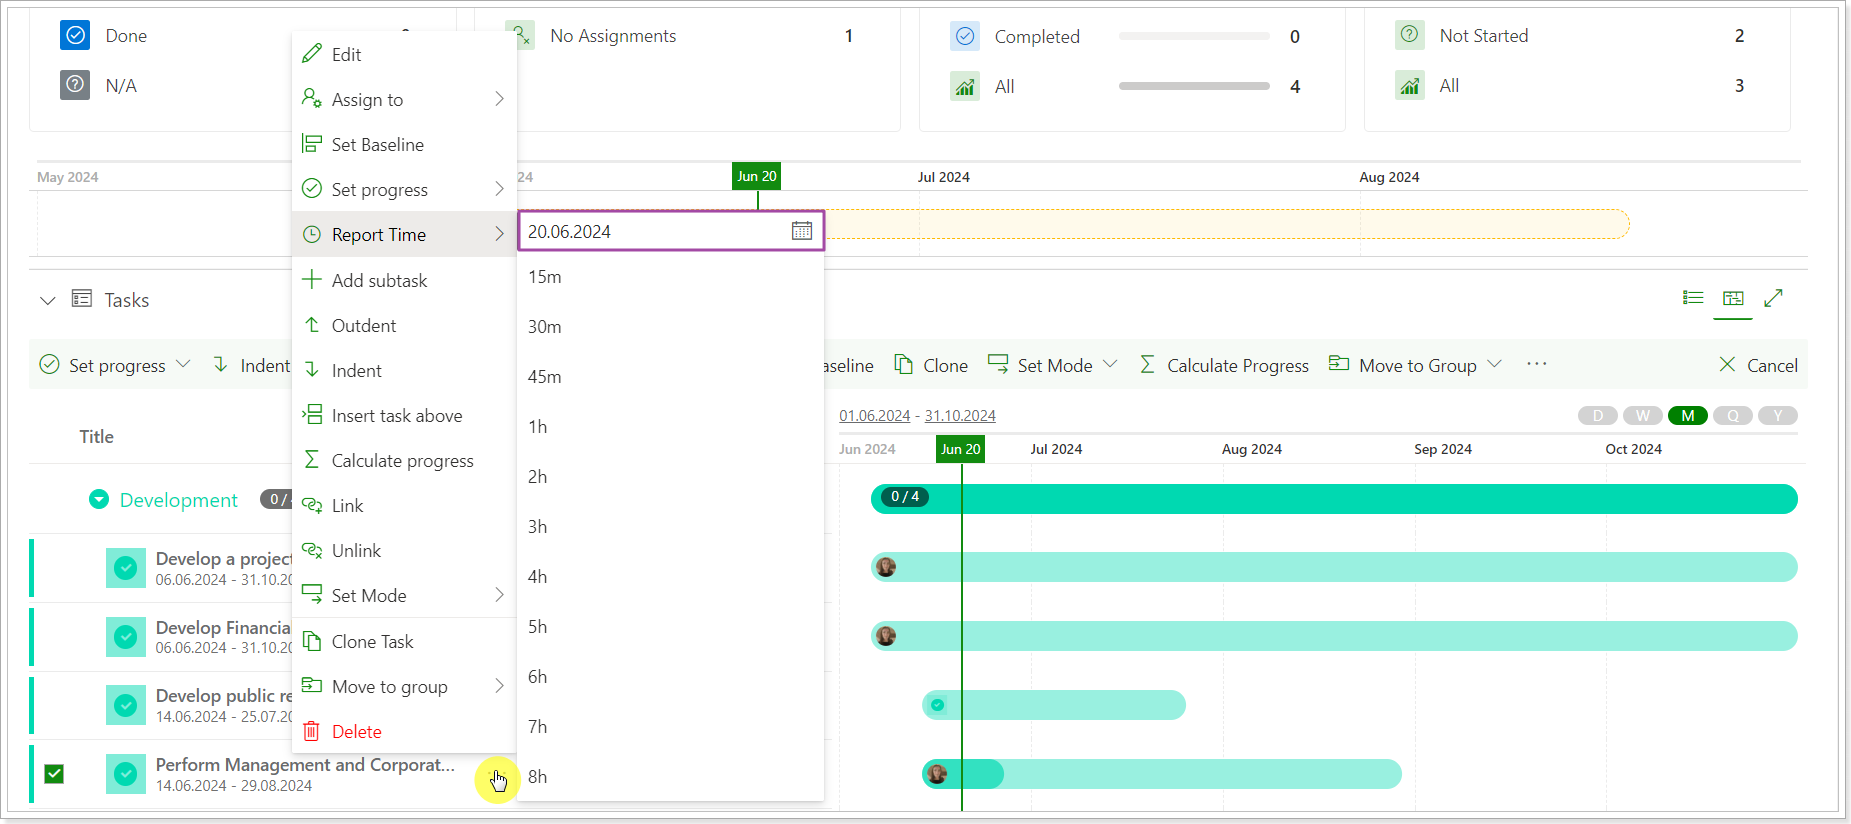
Time reporting on the Project Tasks page
Navigate to the Project Tasks page. Click on the ellipsis button next to the task assigned to you. Select the Report Time option from the list.
Select the required date from the Calendar and the time spent on this task. The time will be recorded on the My Time page.
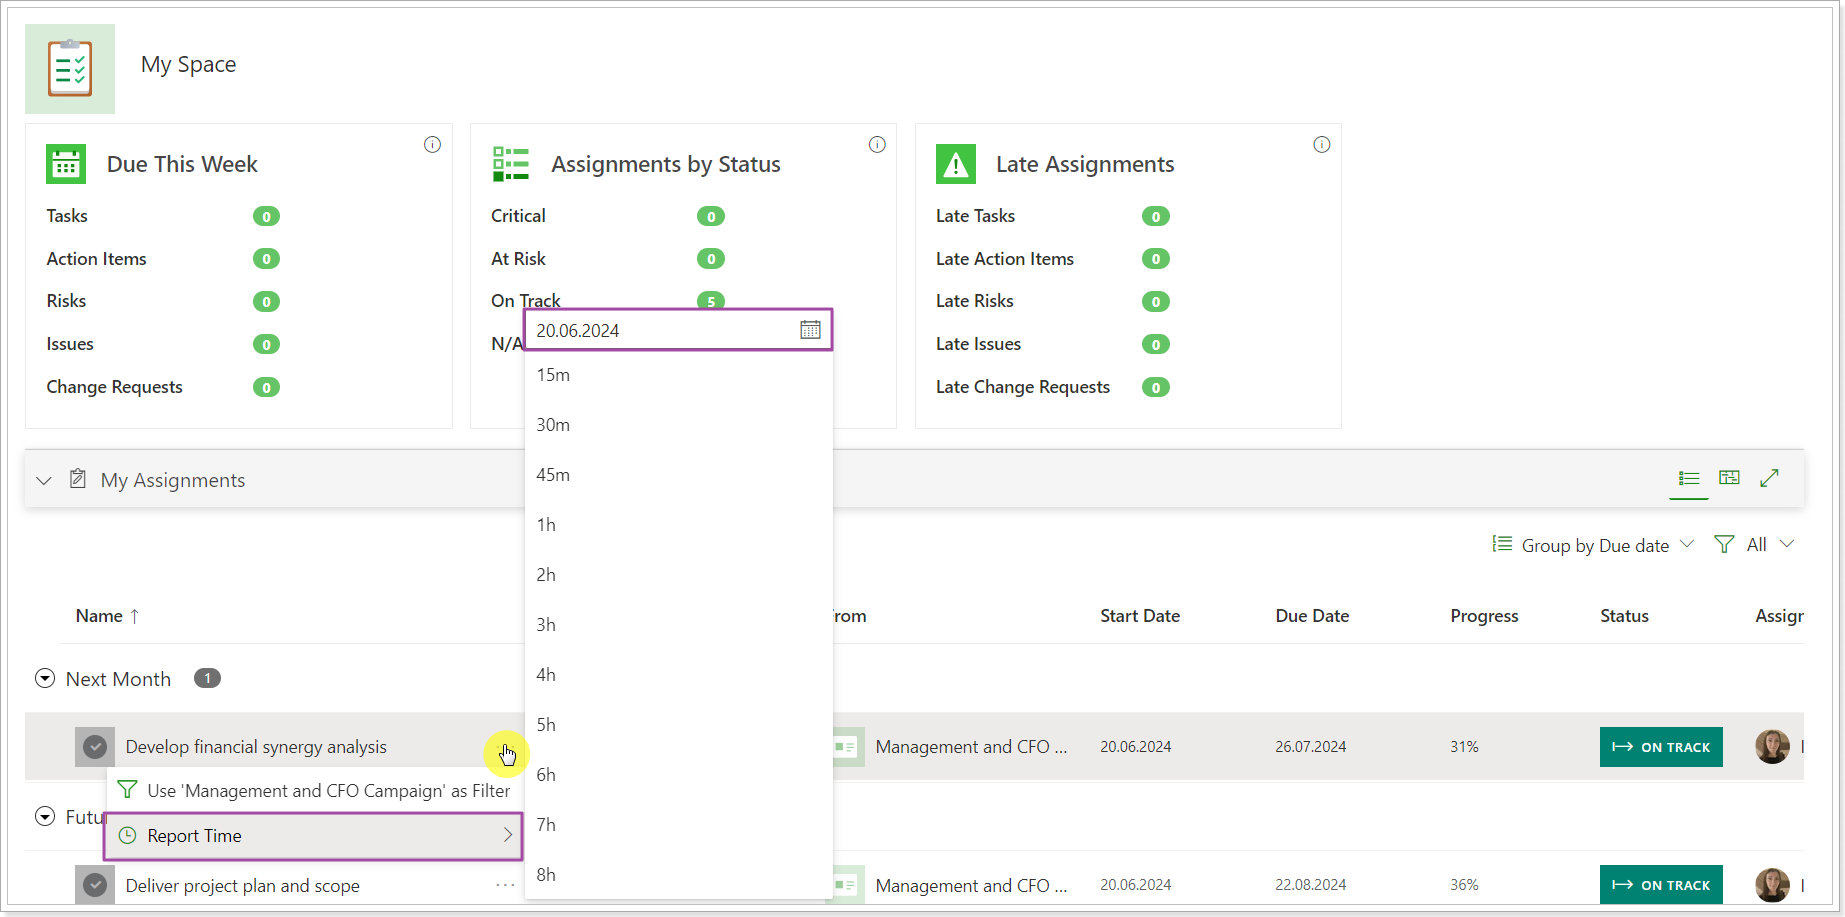
Time reporting on the My Space page
Navigate to the My Space page. Click on the ellipsis button next to the task assigned to you. Select the Report Time option from the list.
Select the required date from the Calendar and the time spent on this task. The time will be recorded on the My Time page.
Time reporting on the My Time page
If the Smart Suggestions option is enabled, all tasks assigned to a user will appear on the timesheet automatically. The user can start reporting the time on these tasks immediately.

If the Smart Suggestion option is off, the timesheet will be empty at first, and the tasks for time reporting will need to be added manually.
This setting also defines if all Projects where a Resource has planned hours and where the resource is added to the Resource Plan in the Committed mode are added to the Timesheet. Also, the selected time period on the Resource Plan should overlap the time reporting period for the smart suggestion to appear on the My Time page.
A timeline entry called 'Project Work' will be created for these Projects on the My Time page, marked with a custom time entry icon.
Despite the Smart Suggestion option, users can report time on their tasks and activities in the following ways:
- Import Tasks
- Add Administrative Time Entries
- Add Custom Time Entries
Import Tasks
Users can import tasks from the Projects they can access to the timesheet.
To do this, click the Import Task button, search for the required task, and add it to the timesheet.

Add Administrative Time Entries
Users can add Administrative Time Entries to report on non-project or non-working tasks or activities.
The Administrative Time Entries are added and managed by PPM Express Administrators and users with Manage Time Tracking permission on the Time Tracking settings page.
To start reporting time on administrative tasks, users need to add these categories to the timesheet first.
For this, click the Add Administrative Time Entry button and select the date, category type, time spent, and description (if necessary). Click the Report Time button.

Add Custom Time Entries
Users can add Custom Time Entries to report on their custom tasks or activities related to a Project that don't appear in the Project's schedule.
To start reporting time on custom tasks or activities, click the Add Custom Time Entry button and find the Project for which you need to create a custom task/activity. Click the Report Time button next to the required Project.

Select the date, type in the entry name, time spent, cost type, if billable, and description as necessary. Click the Report Time button.
The Project will be added to the timesheet with the custom entry. However, this custom task/activity will not appear on the Project (it won't be added as a Project task). Custom time entries are created only for time reporting.

Once the timesheet line for the corresponding task is added, users can report time on the timesheet.
To enter time on the timesheet, users can click or double-click in a cell of the Timesheet grid. They can also enter time by clicking in the cell, providing time, and moving forward with the arrow keys or Enter.
To add more data to the time entry, users can hover over the corresponding cell and click the Edit Time Entry button in the tooltip. A panel will open where the user can report time, add a description, cost type, billable, or enter other custom data.

Reported Time is entered as hours, down to minutes. The display format is ‘00h 00m’. If users enter an integer, the system considers it as hour/s: 0 > 0h. If users enter a decimal, the system will convert it to hours and minutes: 0.00 > 0h 00m. If users enter time without spaces, the system will convert it to an acceptable format: 0h00 > 0h 00m.
The lowest value for time reporting is taken from the Time Tracking setting ‘Time Entry Minimum Duration’. If a user enters less time than the minimum duration set in this setting, it will be automatically rounded to the specified minimum.
Also, there is another setting that has an impact on the final time recording, the ‘Time Reporting Increment’ setting. The concept is the following: e.g., the Time Entry Minimum Duration setting is 15 minutes, and the ‘Time Reporting Increment’ setting is 10 minutes. So, when a user reports time, the system checks if the reported time is less than 15 minutes. If it is, the system rounds up the final record to 15 minutes. If the reported time is more than 15 minutes, the system rounds it up to the next nearest max value divisible by the selected increment <‘Time Reporting Increment’ setting >. For example, a user reported 25 minutes. It’s greater than 15 minutes and not divisible by 10. In this case, the time will be rounded up to 30 minutes.
These settings are located on the Time Tracking page, which is available for users with the Admistrate app or Manage Time Tracking permission.
If a user works on the same task during the whole timesheet period, there is no need to report time for each day separately. It is possible to use the Clone button on the time entry tooltip. The time entry can be cloned to the next working day or the previous working day and filled in for the entire period. The entry type and all values of the time entry level fields will be cloned. If any time entry has reported time, it will be summed up with the cloned time reported. The time entry field values, if any, will be overwritten.

Also, the tasks can be copied to the next timesheet period if a user continues working on the same task and if the next period is created and open.
To do this, click the ellipsis button next to the task name and click Copy task to the next Period.

The Total Reported Line displays the Total Reported Hours per day and Expected Hours based on the Resource Calendar and General Calendar settings.
The cell background of the Total Reported Line is highlighted in red in case a user reported more time than expected based on their resource capacity.
The Total Reported Column displays the Total Reported Hours per period selected in the timesheet for each line (Projects and Tasks).
Clicking on the Actions menu, you will find additional options for time reporting:
-
Import from M365: With this functionality, users can seamlessly import their Microsoft 365 activities, such as events, tasks, and other items, directly into PPM Express as time entries, making it easier to track and report time spent across projects.
To start using this feature, you need to add the Microsoft 365 connection from the My Time page using your Microsoft 365 account. For more details, please refer to this article. - Import External Time: This feature allows users to import external time tracking suggestions created via the API into PPM Express as Time Entries. External suggestions, including project tasks, custom tasks, and administrative tasks, provide a streamlined way to integrate time tracking data directly into the platform. For more details, please refer to this article.

Editing and deleting reported time
Editing the reported time
To edit time in the timesheet, click or double-click in the cell and enter a new value, the old one will be overwritten. Alternatively, hover over the cell and click the Edit Time Entry button in the tooltip.
If the user reports time in the timesheet cell on the My Time page and then reports additional time for the same day from the Project dashboard Tasks section, the numbers will be summed up.
If the user reports time in the timesheet cell on the My Time page and then reports additional time for the same day from the My Space, My Assignments section, the numbers will be summed up.
Suppose the user has reported administrative time using the Edit Time Entry option (on the cell directly). Next, the user reported additional administrative time on the same date using the Add Administrative Time Entry option. In this case, the numbers will be summed up, and the field values will be updated with the latest changes if any (for example, the Description will be overwritten).
Deleting the reported time
Reported time can be cleared/deleted in the following ways:
By entering 0 into the timesheet cell, selecting the cell by clicking on it, and pressing either the delete or back button on the keyboard.
If time needs to be cleared for the whole period, click the ellipsis button next to the task and select Clear Visible Task Time. All reported time for the task will be cleared, and the Completed Work will be recalculated.

If you need to clear time for the whole period and delete the timesheet line, click the ellipsis button next to the task and select Remove Task from Timesheet. All reported time will be cleared, the timesheet line will be deleted, and the completed work will be recalculated.
The tasks suggested by the system cannot be deleted.

If time needs to be cleared for all tasks in the Project for the timesheet period, click the ellipsis button next to the Project and select Clear Visible Project Time. All reported time for all tasks in the selected Project will be cleared in the period, and completed work will be recalculated.

If you need to clear Project time and delete all timesheet lines for the Project, click the ellipsis button next to the Project and select Remove Project from Timesheet. In the period, all reported time for all tasks in the selected Project will be cleared, all task timesheet lines will be deleted, and Completed Work will be recalculated.
Projects for which tasks were suggested by the system cannot be deleted.

Timesheet Approvals
The Timesheet Approvals feature enables organizations to review and approve reported time before it becomes final. This functionality helps ensure a structured workflow where users submit their timesheets for review, and designated managers can approve or reject the reported hours.
Timesheet Approvals are available for tenants on the Enterprise Ultra plan.
The feature is enabled in Time Tracking Settings and is disabled by default. Tenant administrators must enable it manually when they are ready to start using the approval workflow. Also, Timesheet Approvals must be enabled for the Time Reporting Periods.

Once the feature is enabled, users can submit their reported time for approval directly from the My Time page.

Approval requests are sent to the appropriate managers depending on the type of reported time:
- Project/Non-Project time is sent to the Project Manager assigned to the project.
- Administrative time is sent to the Direct Manager assigned to the resource.
- Administrators can see and process all requests.
An Approval Center page is used for reviewing timesheet approval requests.

From the Approval Center page, approvers can:
- View all approval requests assigned to them
- Review the reported time details
- Approve or reject requests
- Add comments to their decision
For more details, please refer to the Timesheet Approvals article.