
Resource dashboard page allows viewing and editing all the information about a specific Resource.
The Resource dashboard includes five sections: Workload, Work Week, Calendar Exceptions, Utilization, and Details.
In the upper right part of the page, you can review the source system to which the Resource is connected.
In this article, we describe the Resource dashboard sections for Project-level Resource Planning. If a Program or Portfolio level is selected on your tenant instead of Projects, all the settings and Resource Planning logic will be the same.
Workload
The Workload section is used to review all assignments for the selected Resource across PPM Express and plan the Resource workload accordingly. The ‘Workload’ section shows the Tasks, Action Items, Risks and Issues that are due this month or late as well as all assignments by status.

If you click the ‘View Resource Assignments’ button, the Workload page will open, where you can review all Resource assignments in detail. Use the pre-filters and filters to review the information as you need. This page is similar to the My Time page, where users report their time.

If you click the 'View Resource Time' button, the Time Reporting page will open, where you can review the time reported by the user in detail.

Work Week
The Work Week section is used to specify the work week settings for the specific Resource (if the Resource is working part-time, has weekend shifts, etc.).
As a rule, all Resources use the common tenant-wide work week settings set by PPM Express Administrators on the Calendar Settings page. If needed, it is possible to set the workweek settings for the specific Resource. If the specific settings are provided in the Work Week section of the Resource dashboard, it will override the tenant-wide settings for this Resource.
To set the work week settings for the Resource, perform the following:
1. Open the Resources dashboard, and in the Work Week section, click on the 'Use personal settings' button.

2. Set the work week time as required. The changes will be saved automatically and applied to the Resource at once.

3. If you open the Project for which this Resource is allocated, the changes will be applied there as well and the Resource capacity and availability will be calculated according to these settings.
To apply the tenant-wide workweek settings for this Resource, click on the 'Use common settings' button.

Calendar Exceptions
The Calendar Exceptions section sets the calendar exceptions for the specific Resource (if the Resource is working on holidays or vacation, etc.).
As a rule, all Resources use the common tenant-wide calendar settings set by PPM Express Administrators on the Calendar Settings page. If needed, it is possible to set calendar exceptions for the specific Resource. If the calendar exceptions are set for the same date as tenant exceptions, they will override the tenant-wide settings for this Resource. Calendar exceptions can be set on the Resource dashboard or the Calendar Settings page by users and team members.
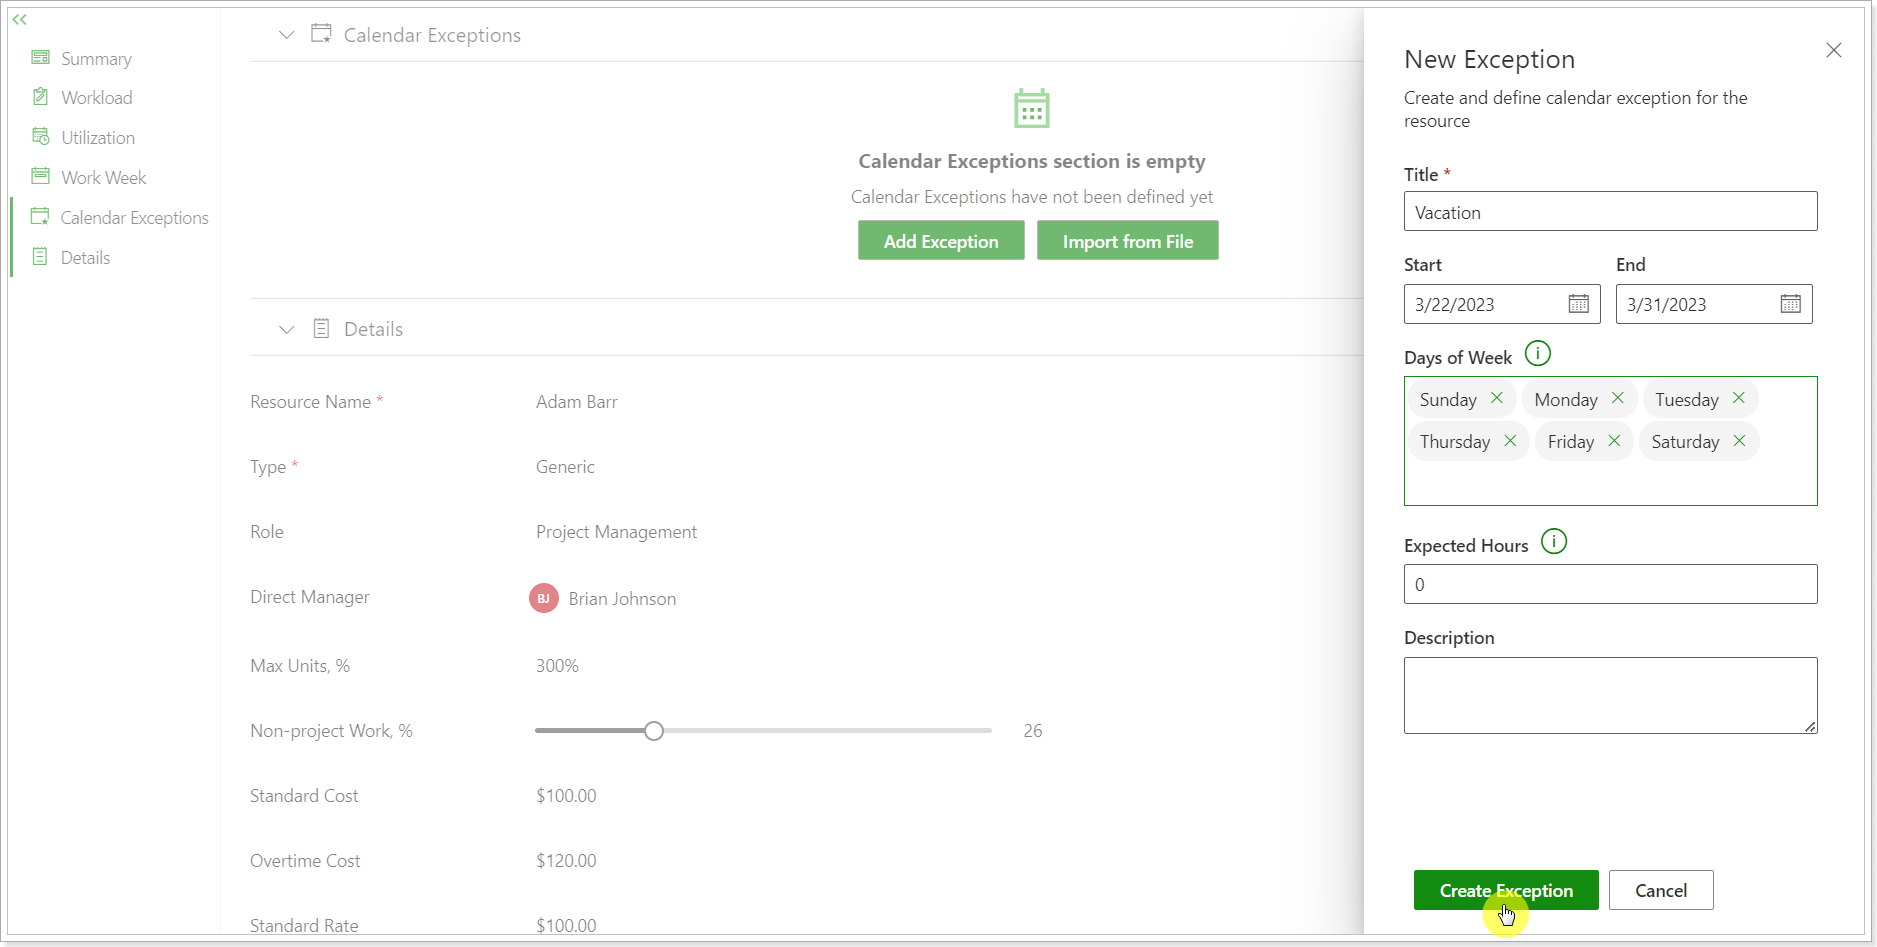
To set the calendar exceptions for the Resource, perform the following:
1. Click the 'Add Exceptions' button in the Calendar Exceptions section. If you have a .csv file with calendar exceptions, you can import them from a file.

2. Provide the required information in the New Exception window:
- Title;
- Start;
- End;
- Days of Week;
- Expected Hours;
- Description.
3. Click the 'Create Exception' button.
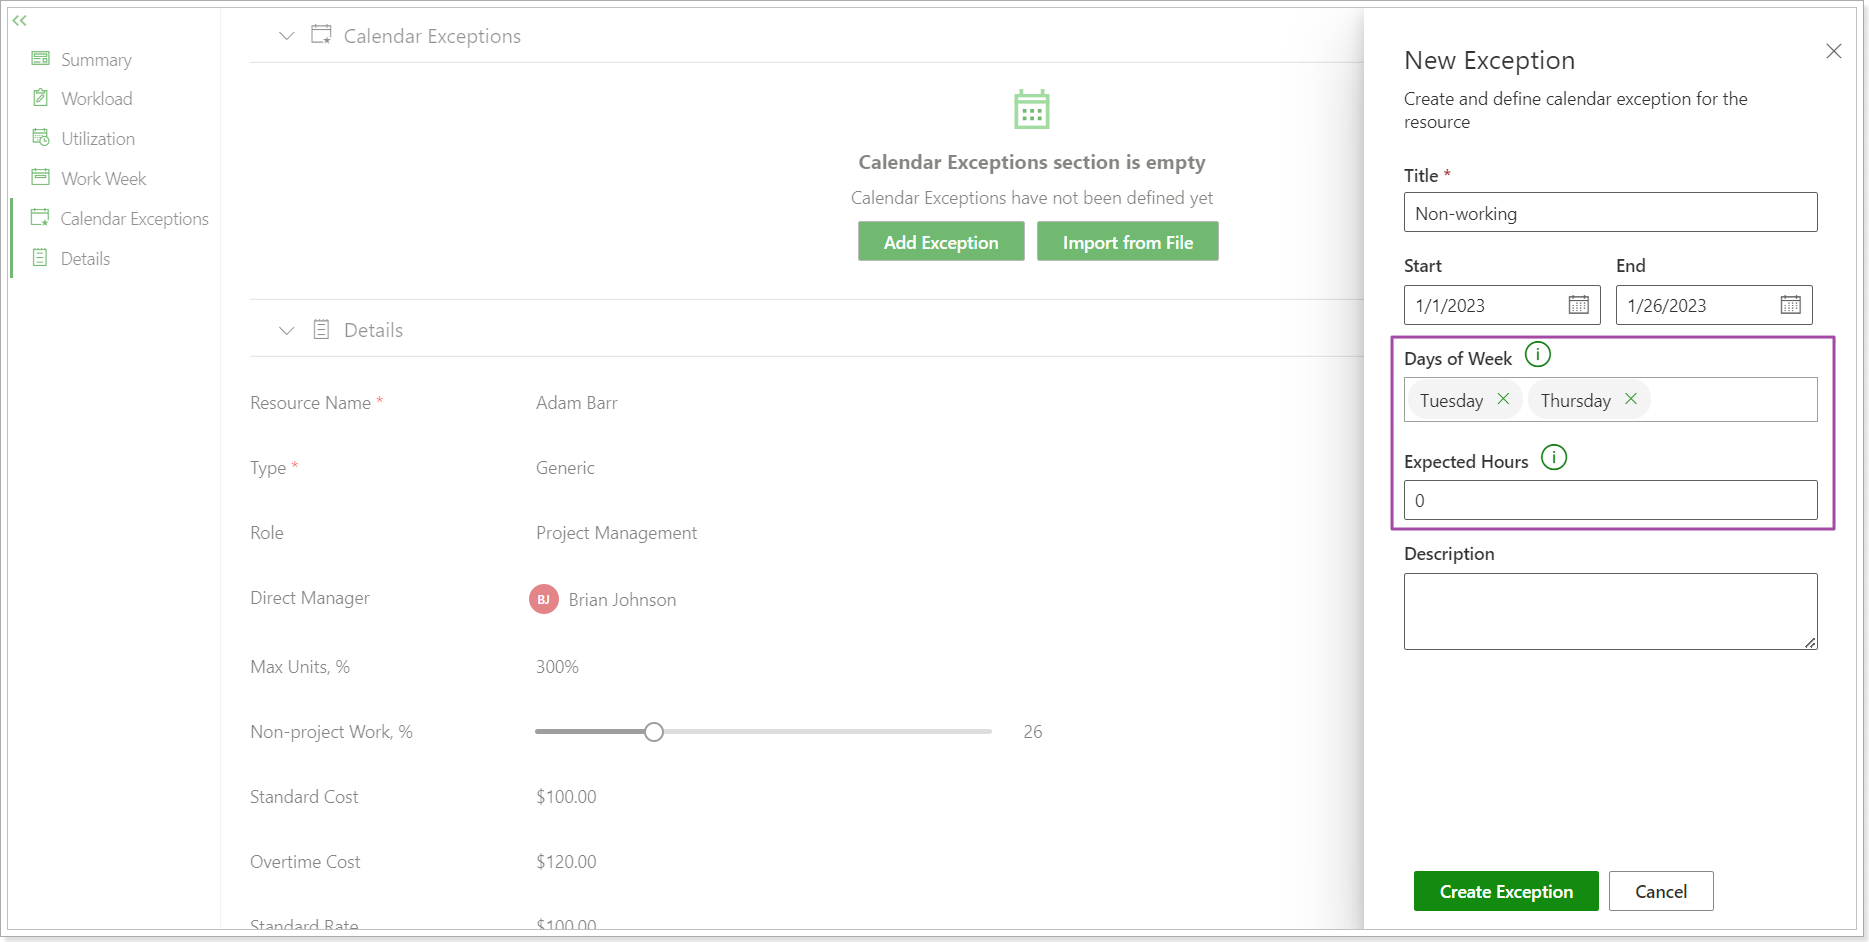
If the exception takes longer than one week, you can specify the days of the week that the current Resource exception is relevant to. For example, if the Resource works part-time for certain days of the week, you can create such an exception.

For other days of the week, regular work-week settings will be applied.
If this Resource is working in shifts or is not working on certain days of the week, you can create another exception for certain days of the week where Expected Hours will be set to 0.
4. When the exception is added, you can edit or delete it. Also, you can create more exceptions using the 'New Exception' button.

It is also possible to export/import Calendar Exceptions to/from .csv file.
If calendar exceptions are created in the .csv files and imported to PPM Express, ensure there is a start and finish date (or a start date only) for all exceptions. The exception will not be imported without start and finish dates.
When the Resource exceptions are added, this information will be taken into account and the Resource availability and capacity will be displayed according to these settings in the Resource utilization section. If you navigate to the selected period, a notification will be displayed where you can review the calendar exception applied and why the capacity is 0 for this period, for example.
If you select to auto-allocate (or manually allocate) the Resource on the Project, the Resource will be allocated taking into account the Calendar Exceptions setting, if any.
Also, if you select to assign the Resource on tasks, you will get a warning message, saying that the Resource has calendar exceptions for the selected period.
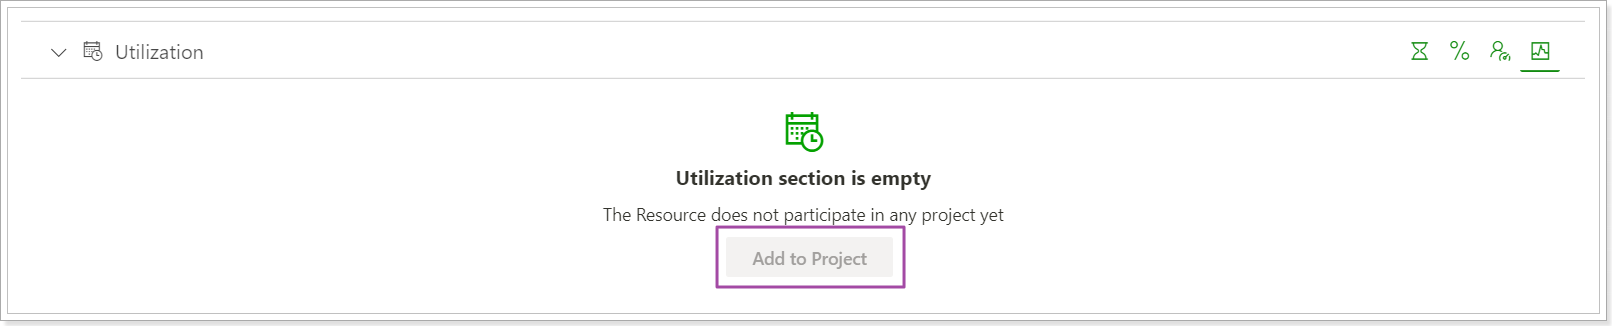
Utilization
The Utilization section shows Resource allocation per Project (Program or Portfolio, depending on the Resource Planning level selected for the tenant).
The Configure Columns button is used to show or hide specific columns from the list or rearrange their order (by clicking and dragging). If you need to add a custom field, this can be done from the Resource dashboard, Details section (the custom fields are shared between PPM Express entities).

The Resource is allocated starting from the Project start date to the Project due date. You can set the custom date range by clicking the Allocate button from the panel or ellipsis button. Also, you can add the Actual Hours for Resources using the Time Type section.
Allocation is available in Hours, Percent, FTE, or Chart Views.
You can review the Resources timeline by day, week, month, quarter, or year.
You can add the selected Resource to the Project or remove this Resource from the Project using the corresponding buttons at the top.
The Resource has two Booking Types: Proposed and Committed. The Uncommit option can be used to set the booking type back to Proposed.
When you allocate the time for the selected Resource, the Resource is in the proposed state. If you would like to commit the Resource, select the required Project, click on the ellipsis button and select the Commit option. When the Resource is committed, you can continue allocating it as required (add more hours, etc.).

Two statuses are available for Resources: Active and Inactive. Only active Resources can be assigned for tasks, key dates, risks, issues, etc. Inactive Resources do not appear in the list of available Resources when assigning them, so they cannot be added for Projects from the Utilization section. However, if an active Resource is assigned for tasks, as an example, all assignments will be preserved for this Resource if it becomes inactive (the time allocated for this Resource in the Project Plan section will be also preserved).
The 'Shift Allocation' option allows moving the hours planned for a Resource(s) if the Resource starts working on the Project earlier or later than planned initially.
Select the Project that you need to shift the allocation for, and select the days and the shift date when the allocation should start. The 'Use Calendar' option allows taking into account the calendar settings (weekends, exceptions, etc). If this option is disabled, the weekends will not be taken into account and the Resource may be allocated for the weekends when the dates are shifted.
If the Resource is planned for 4 hours per day instead of 8 hours (according to the calendar exception for example), when shifting the allocation for the new days, the Resource will be planned for 4 hours accordingly.
Details
The Details section contains the most important information about the Resource. You can add information here for Resource name, Email, Type, Direct Manager, Max Units, Cost and Rates fields, etc.

You can easily show, hide, or add new custom fields to this section using the Configure menu, which is accessible via the ellipsis button in the upper right corner of the Details section. You can also rearrange their order (by clicking and dragging).
Most of the fields can be edited, custom fields can be deleted.
'Role' and 'Department' fields can be configured as well. For more details, please refer to this article.

You can apply an existing layout to the Resource dashboard or create new ones. For more information about the layouts, please open the 'How to create and apply layouts and views' article.